

How To Install Blink Xt
Subsequently a few like shooting fish in a barrel steps, the Blink camera system volition exist showing you clips in the app.
Install the Glimmer application
The well-nigh recent version of the Glimmer app is always available in your app shop.
Blink supports virtually smartphones, tablets, and many Alexa enabled products.
Follow the link or scan the QR code to admission the most contempo Blink app download.
Blink version 6.9.0
for iOS 12.five and later.
![]()

Glimmer version 6.9.ii
for Android v5.0 (Lollipop) and later.
![]()

Blink version vi.9.2
for Fire Os v5.1 and afterward.


To Get Started with the Blink app, follow the instructions below:
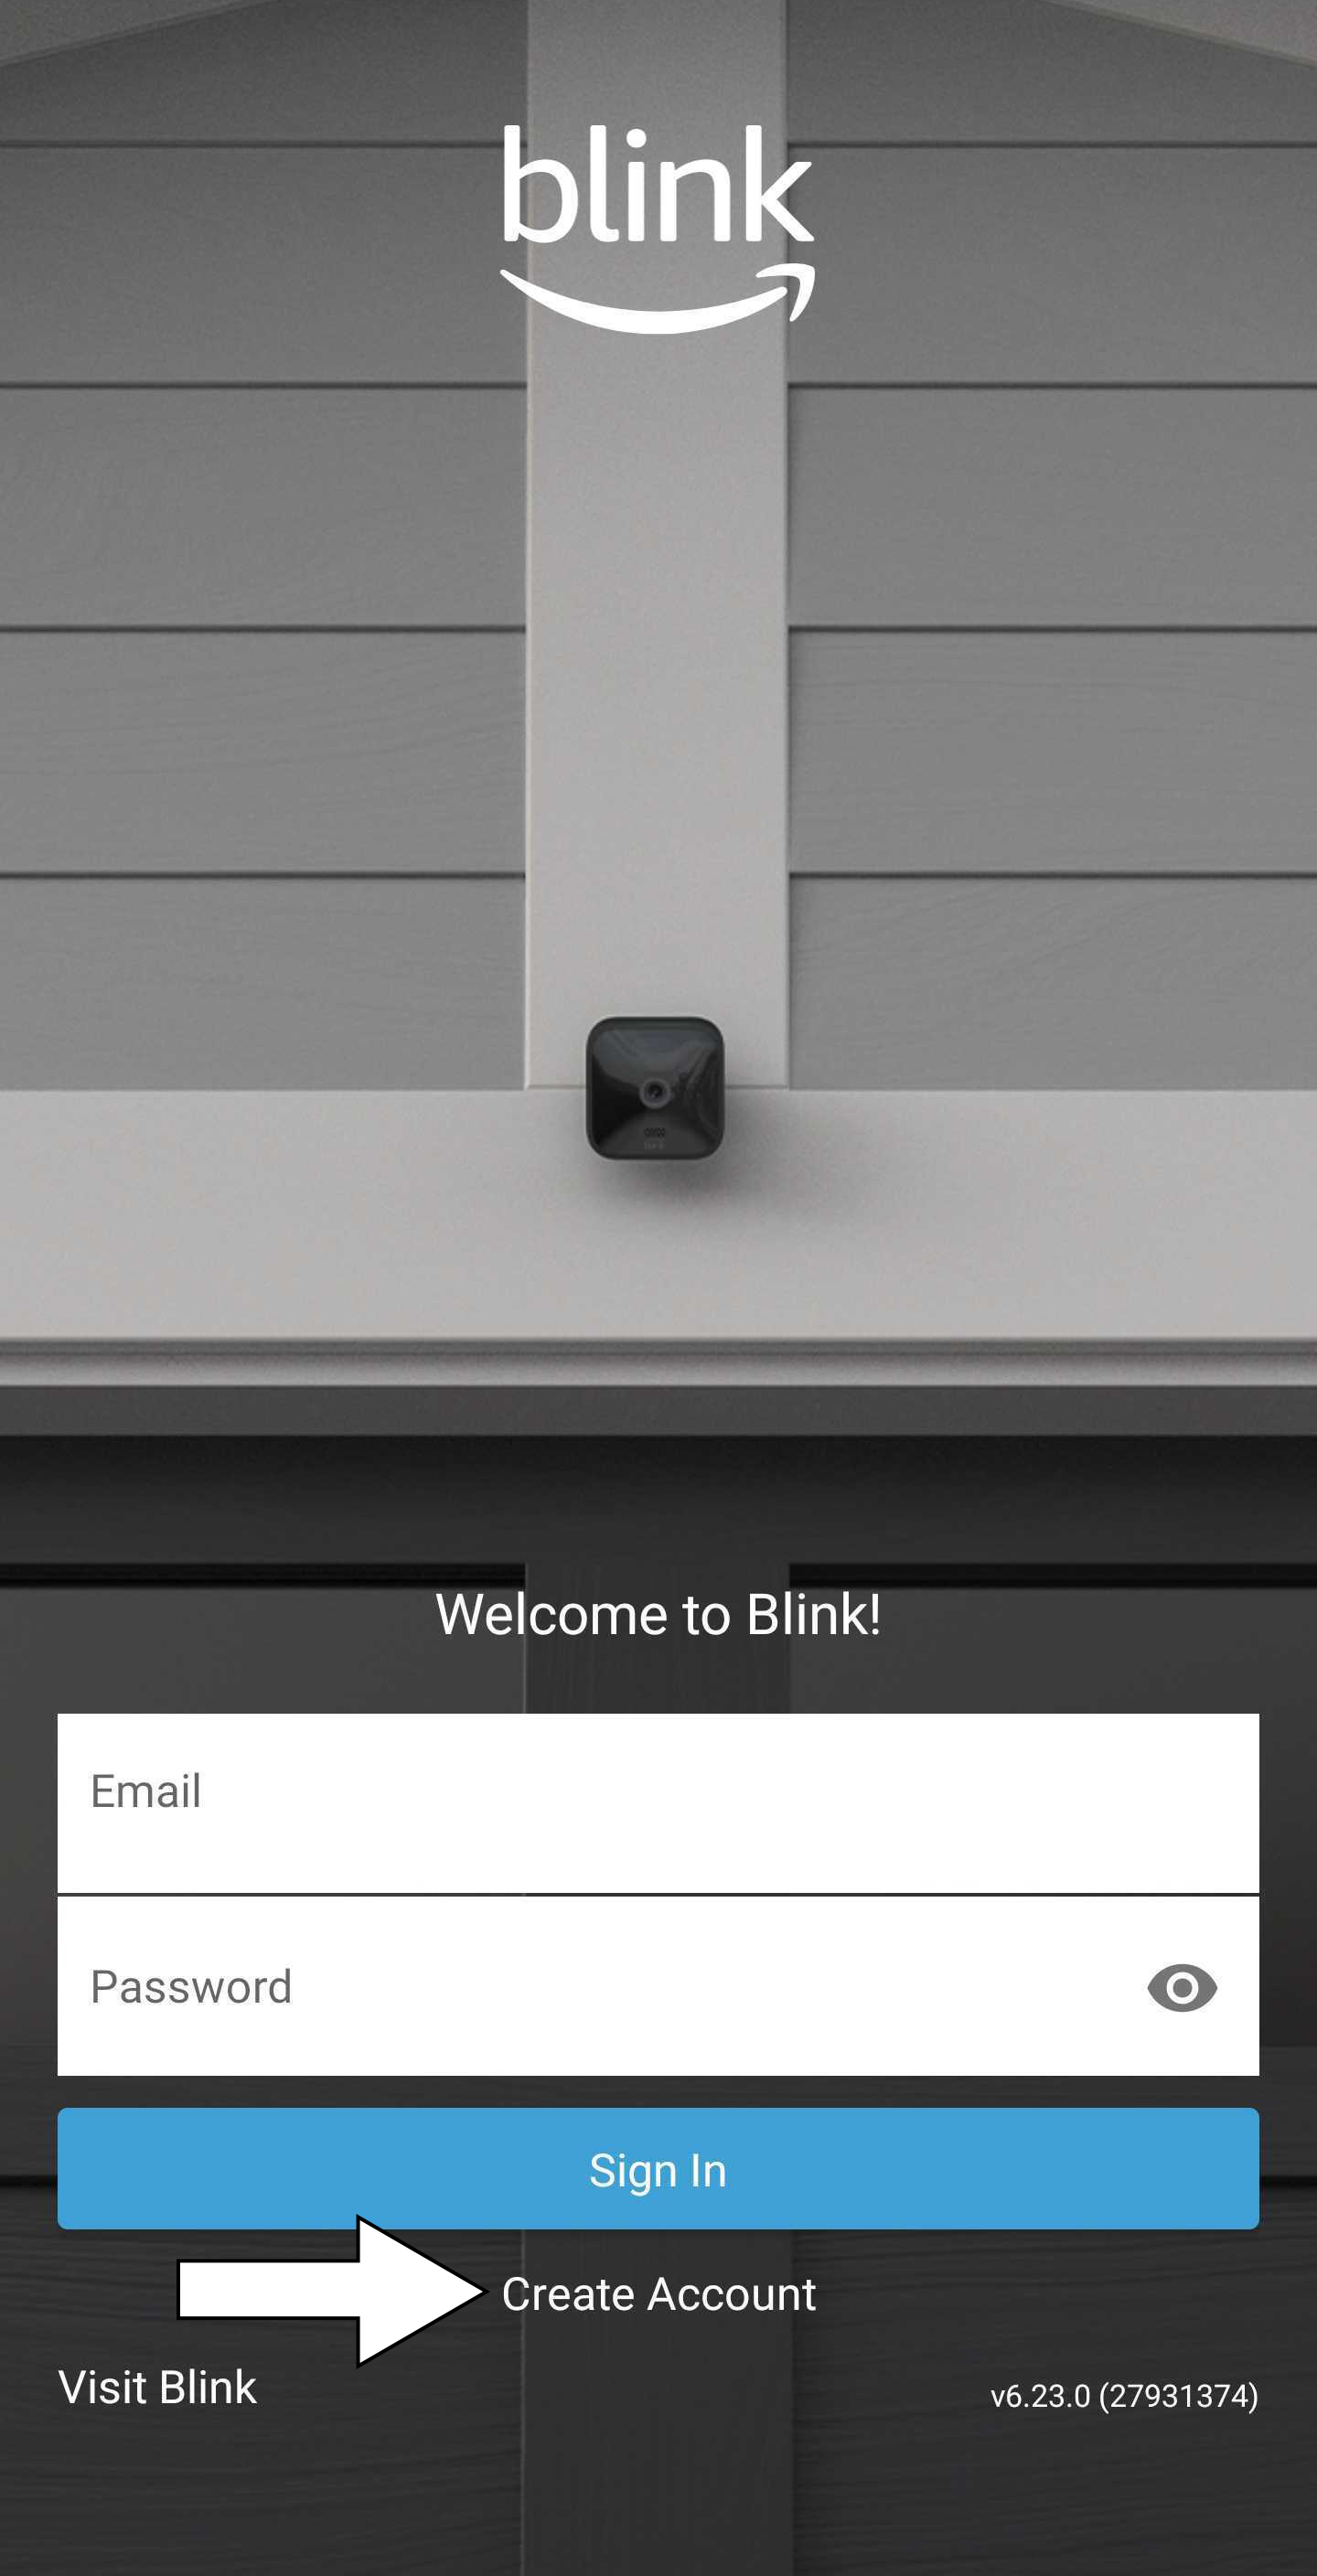
one. Launch the Blink App and tap Create Account at the bottom of the screen.
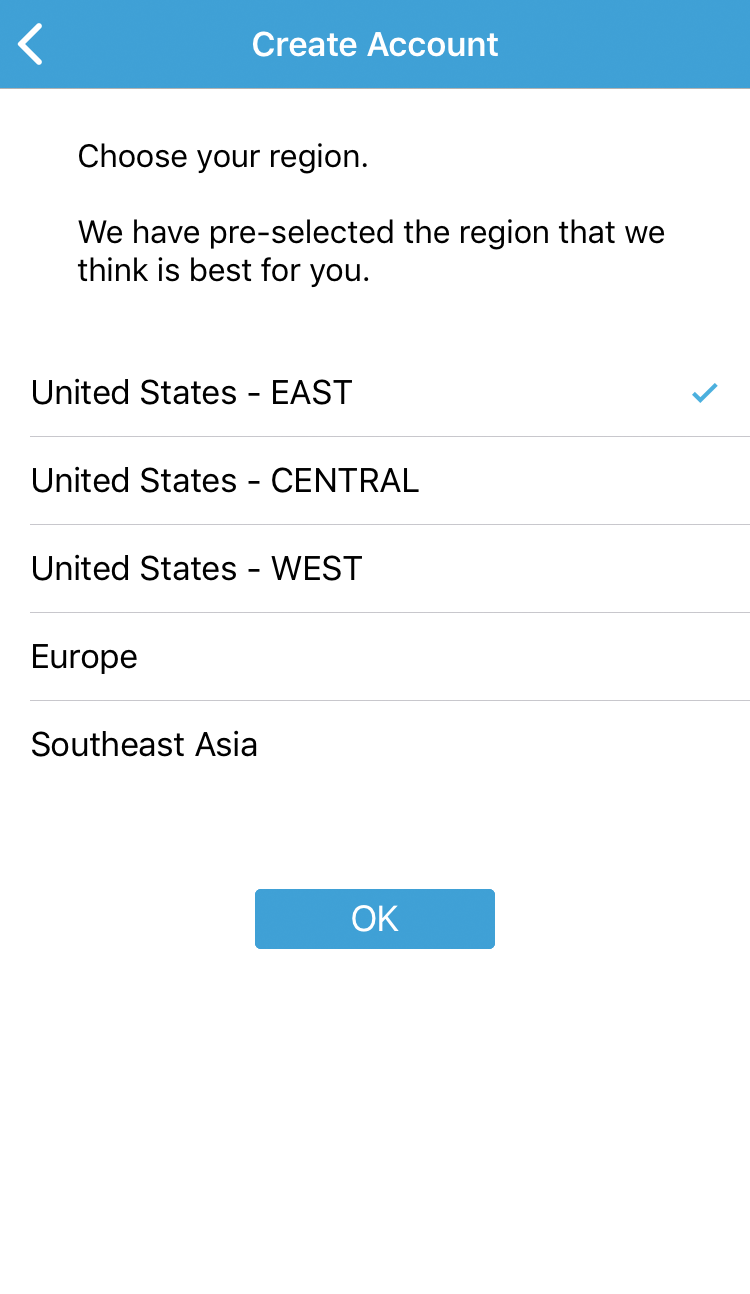
2. Select your country from the drop-down card and tap Adjacent.
| | |


3. Confirm your region and tap OK.
A region is pre-selected based on your IP address.
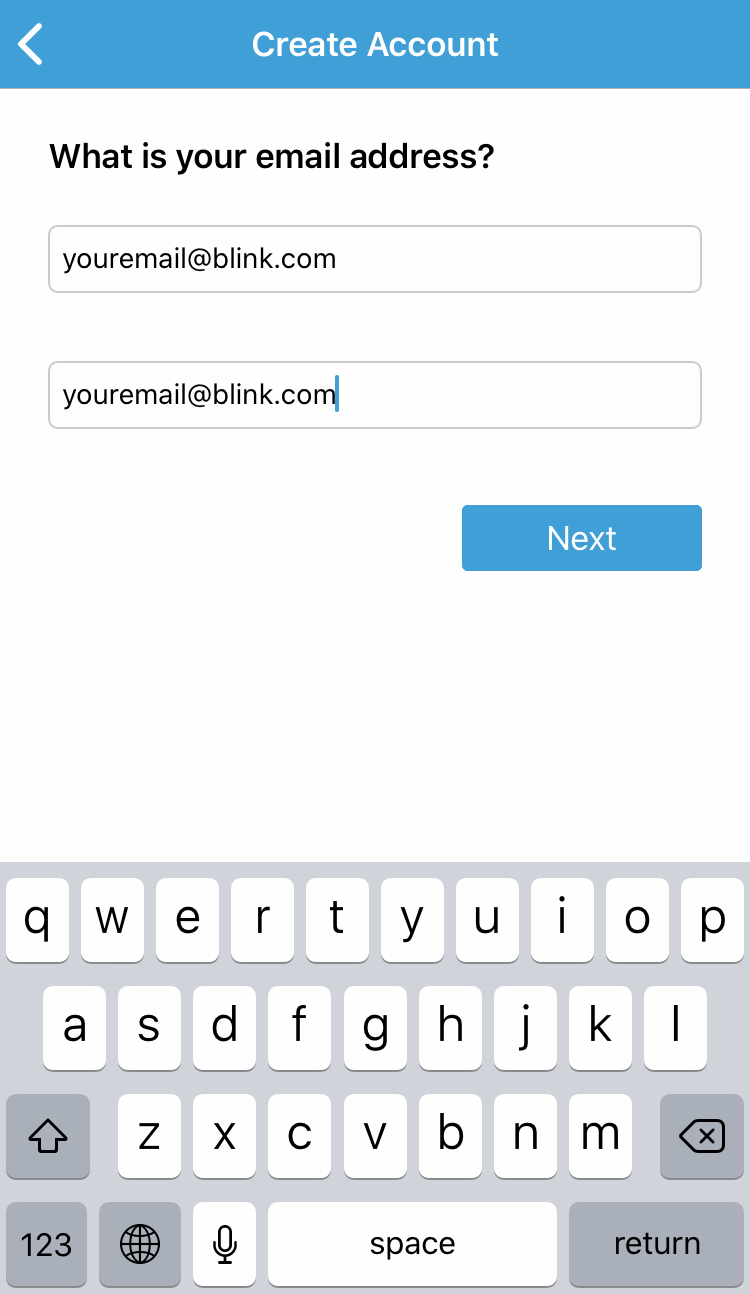
4. Enter a valid e-mail accost, and tap Side by side.
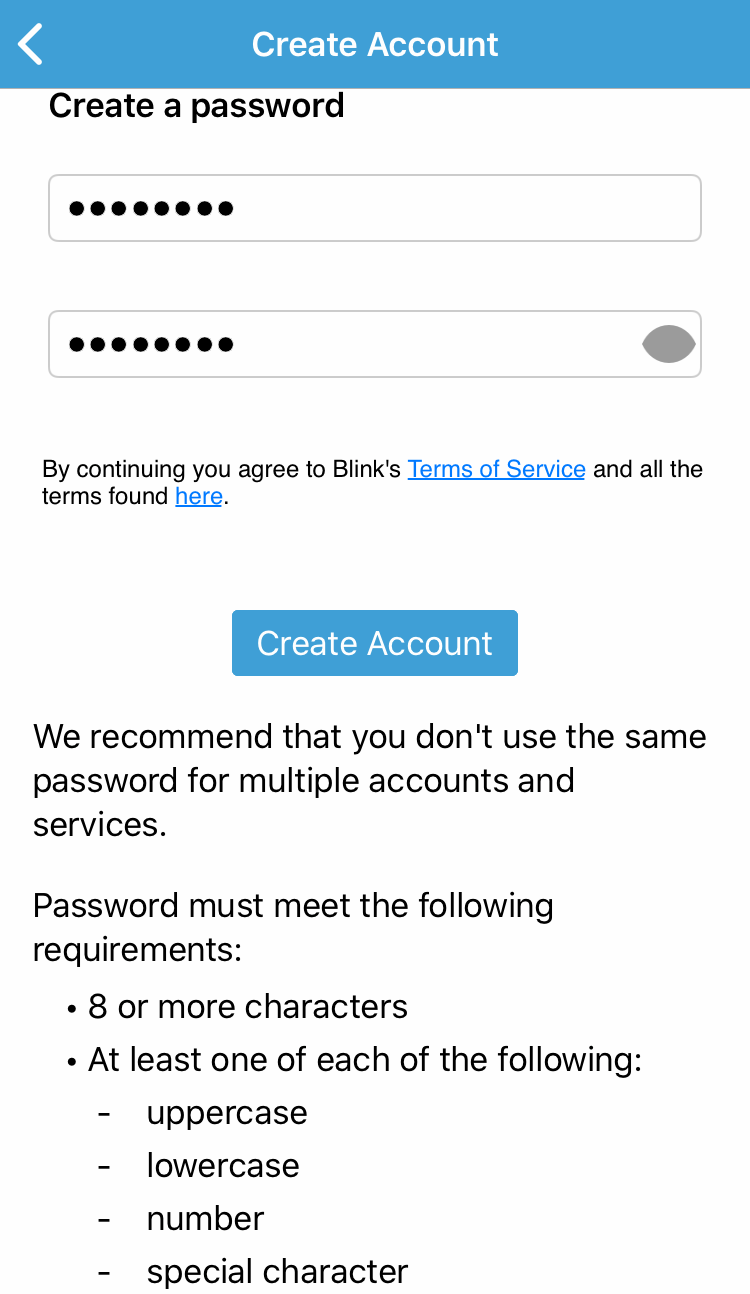
5. Create a countersign and tap Create Business relationship.
The countersign requirements are listed at the lesser of the screen.
6. Complete the multi factor account verification process.
Enter the PIN from the e-mail we sent yous and tap "Verify".
 |  |
| New Account Pin | New Account with Expired PIN |
Pivot codes are valid for 40 minutes. After one minute, the "Resend Pin Code" pick appears.
When yous accept verified your e-mail address, the app configures your SMS text telephone number to send alerts and for account verification.
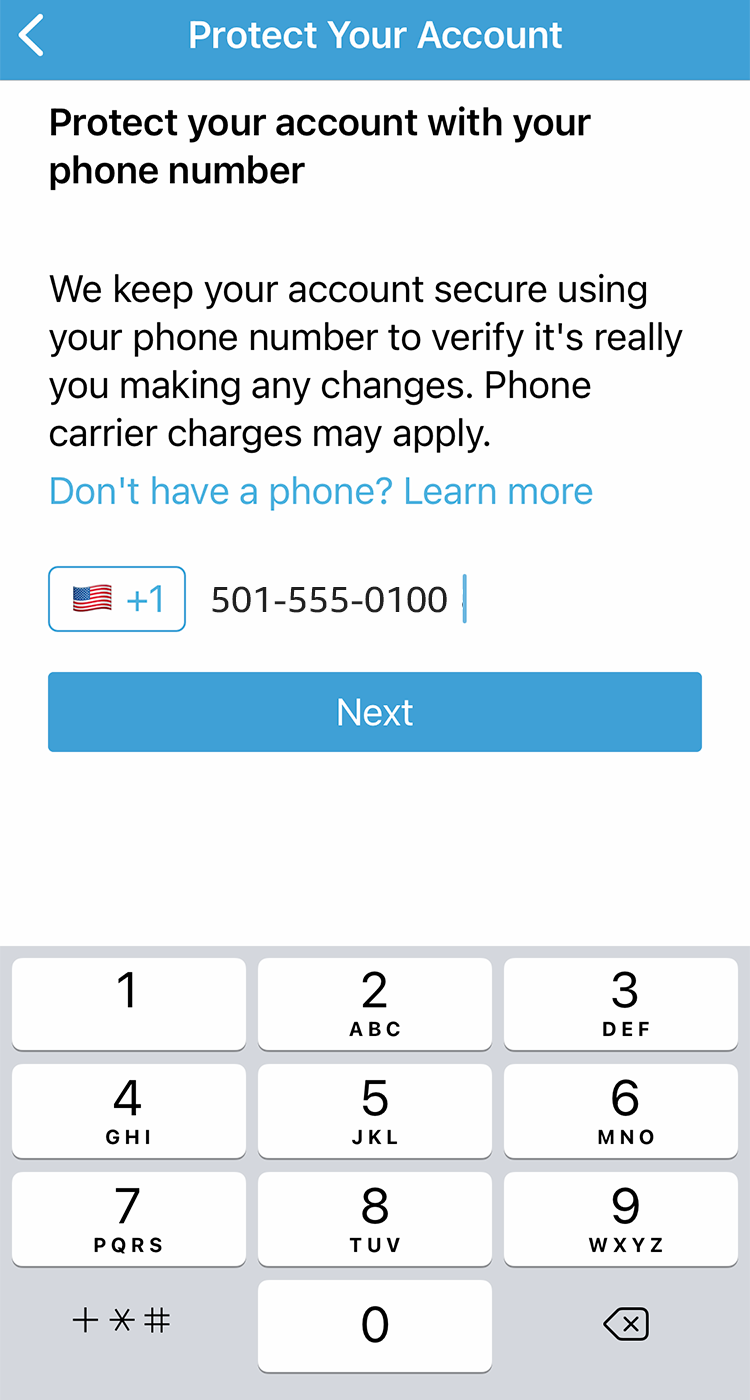
When you are presented with a Telephone number entry screen, tap the Phone number entry line to bring up a keypad.
Select your state lawmaking from the card that is displayed when you tap the flag icon adjacent to the Phone number entry line.
Enter the phone number you wish to use for device verification and tap "Next".
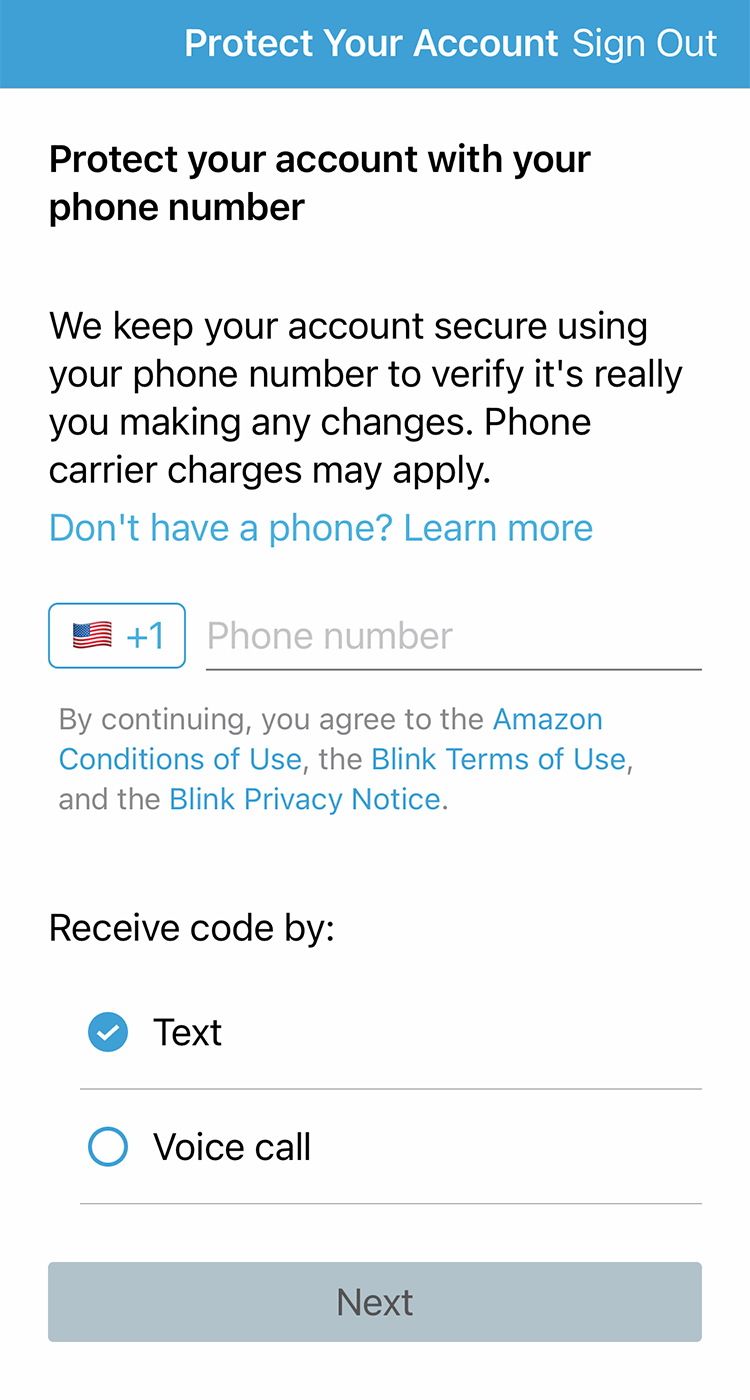
If you adopt to non utilize SMS, the PIN code tin can be read to you past an automated Voice call instead.
To choose this option, select "Voice phone call" and tap "Next".
Note: The SMS text option should just exist used with mobile phone lines and will non work with landlines. Blink ONLY uses this number to positively associate your device to the Glimmer app - to make sure the person making changes is you. Your information is private and will not be used for additional purposes or shared with third parties.
Click to learn why we need your phone number. Contact Customer Service if yous don't have a phone number.
At this point, an SMS Text message containing the Pivot lawmaking is sent to the telephone number, and the Pin entry screen is opened for y'all.
Example SMS Text Message:
Your Glimmer verification code
is:
Enter the Pin from the SMS Text message we sent you and tap "Verify".
Pivot codes are valid for xl minutes. After ane minute, the "Resend PIN Code" option is presented.
 |  |
| Verify SMS PIN | Verify with Pin |
When the verification step is complete, you are prompted to link your new Blink account to your Amazon account, past tapping on the "Link Accounts button". This is an optional stride.Click to larn how to link your accounts at a after time.
You lot also accept the selection to select "Skip" which volition accept you to the home screen, without linking your accounts.
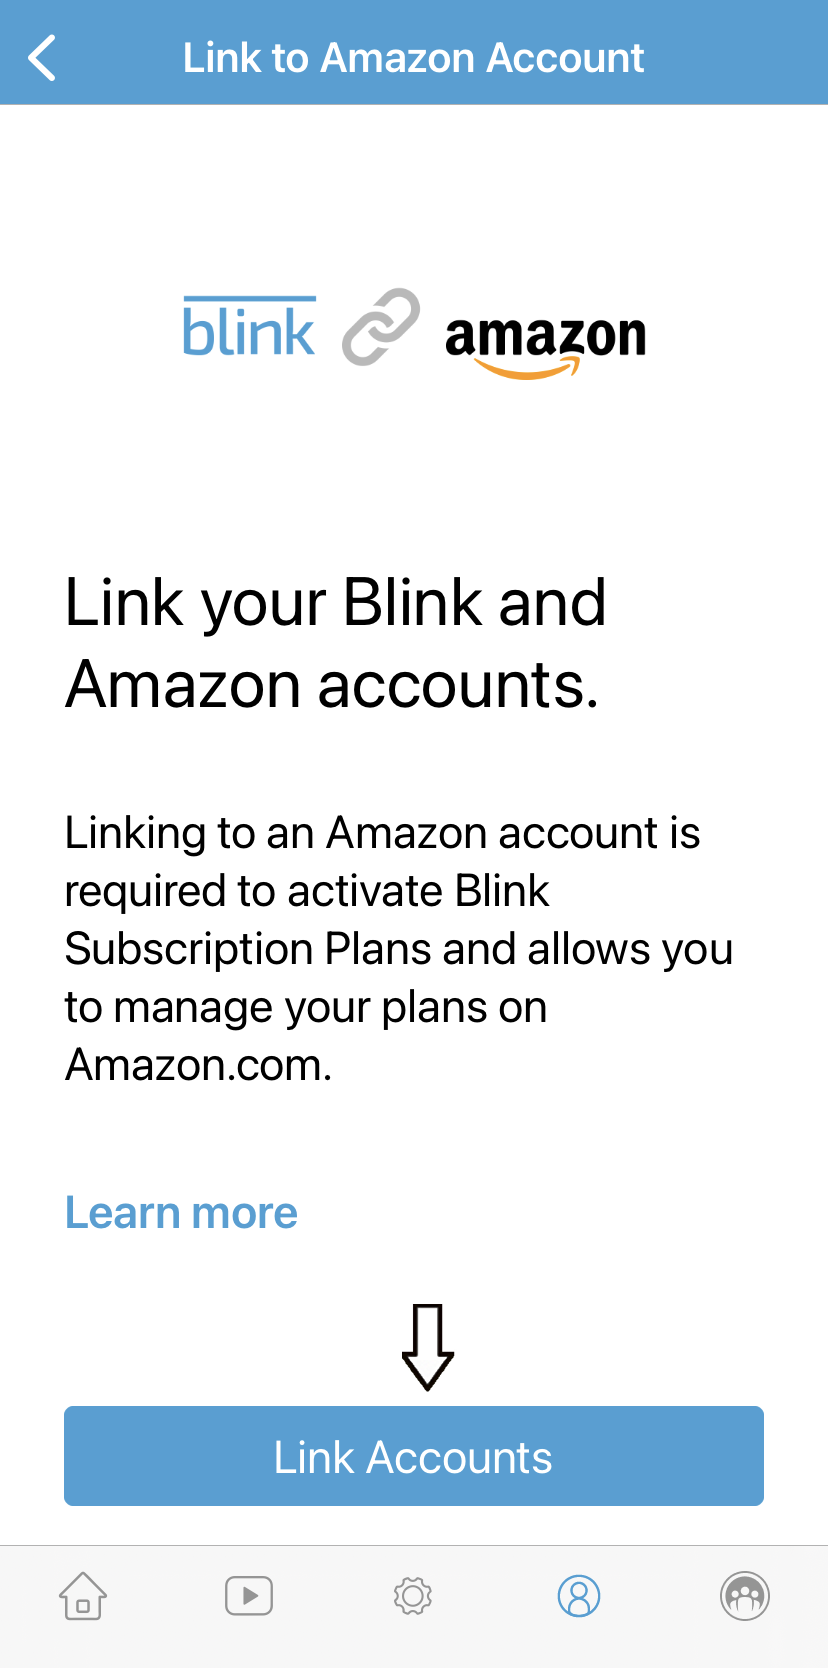
Then sign into your existing Amazon account or create a new i if needed. The link is so established between accounts and click Adjacent.
Install a Sync Module
Add together a Sync Module and create a organization
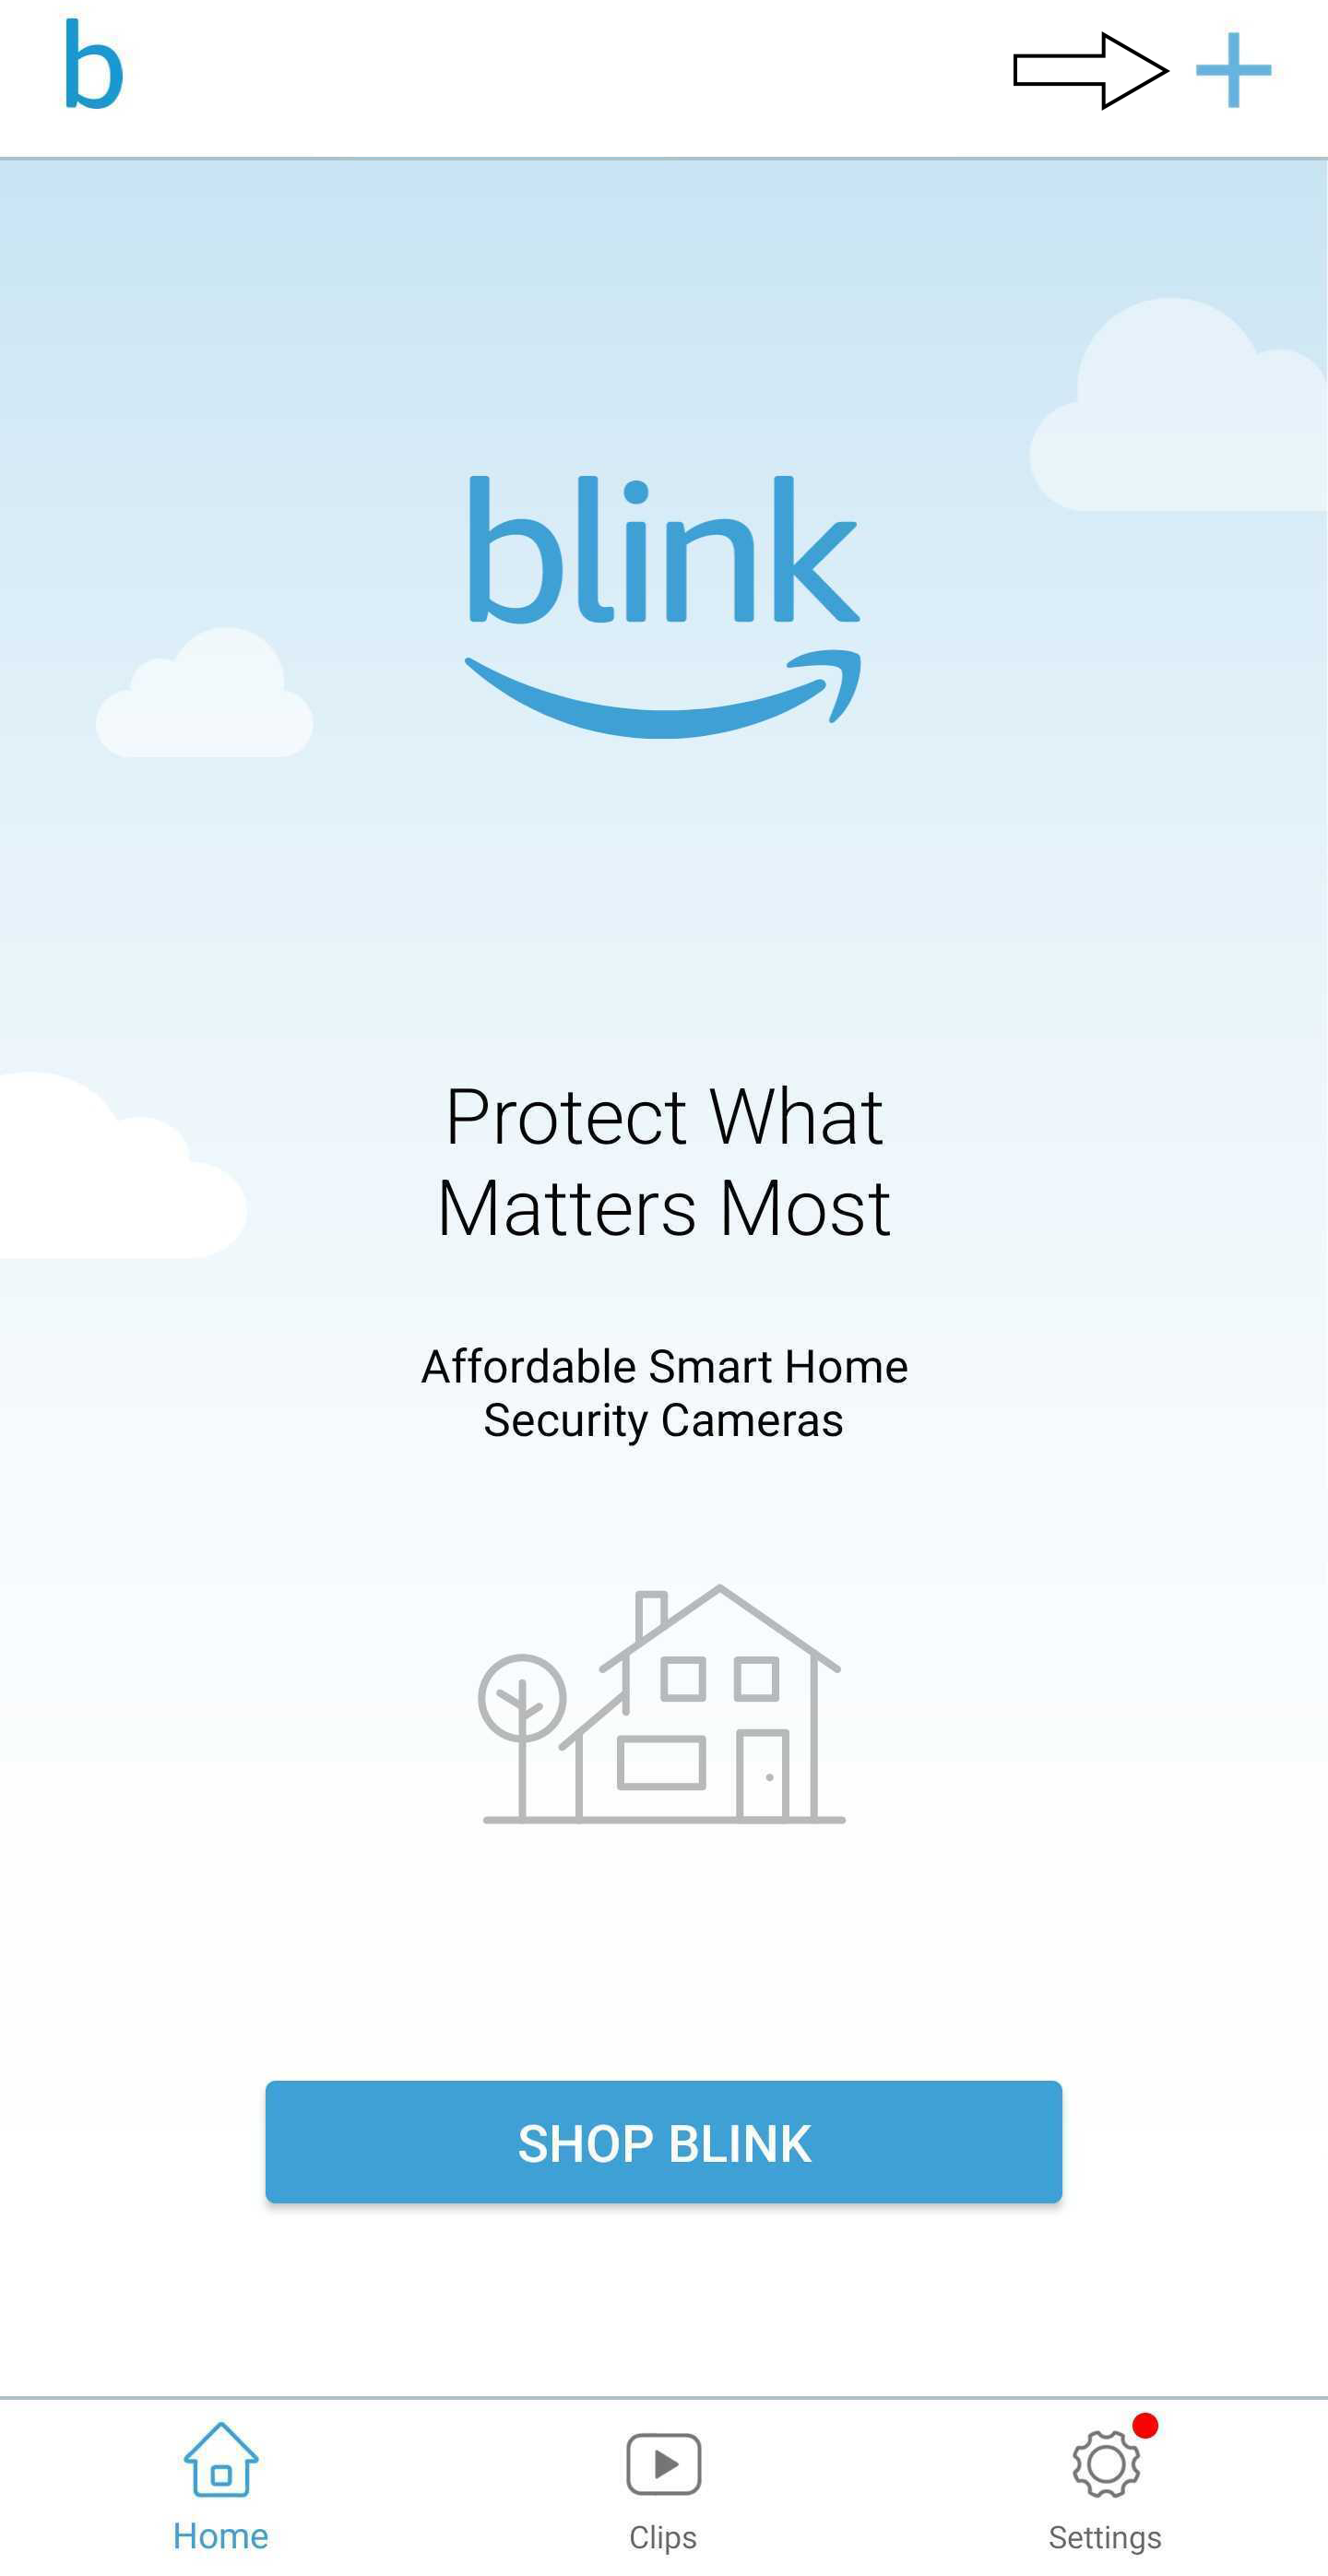
i. From the dwelling house screen, tap the Add Device + icon.
two. The Add Device screen displays your device options.

3. The serial number is also printed as a QR code. To browse a QR lawmaking, the Blink app requires permission to admission the camera on your mobile device.
Tap OK to allow the Blink app to scan the QR code, automatically entering the serial number. If you prefer, y'all tin deny access to the camera by tapping Don't Allow and enter the serial number manually.
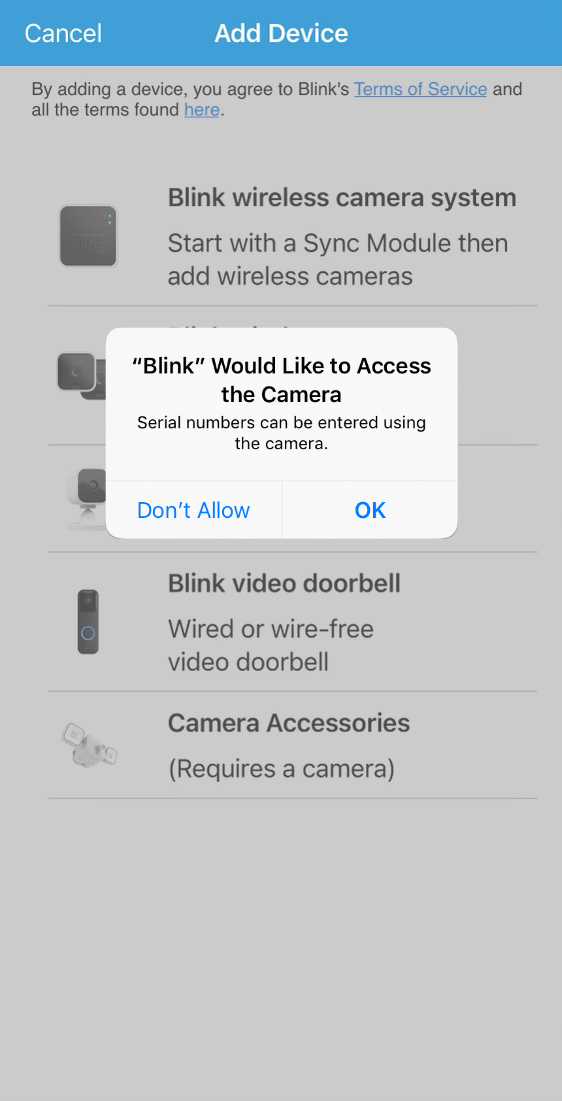
To larn where the QR code and series number are, tap the "Help me observe my QR code and series number" link at the bottom of the Browse QR Lawmaking screen.
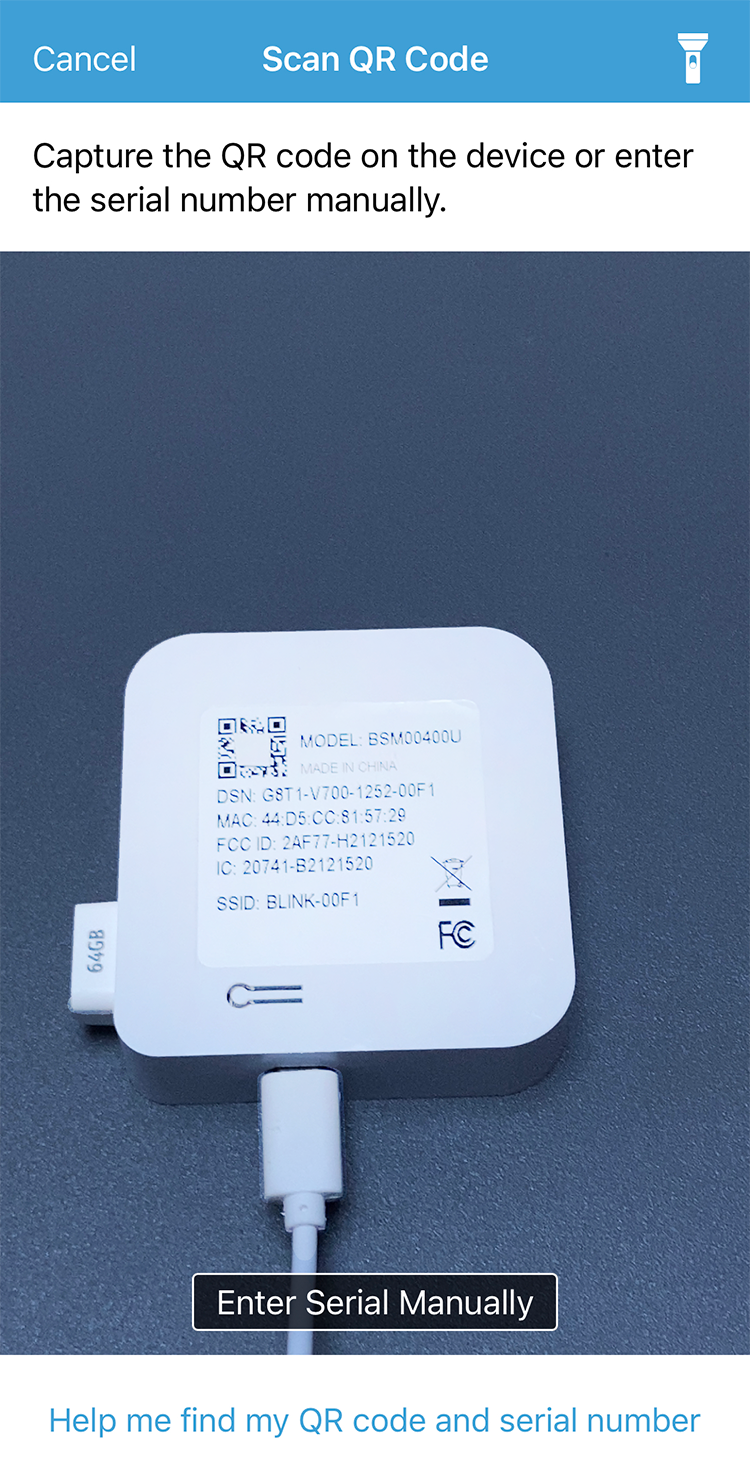
iv. When the QR lawmaking is recognized, y'all are asked to create a new system by tapping the text entry box and providing a name. Tap "Done" to continue.

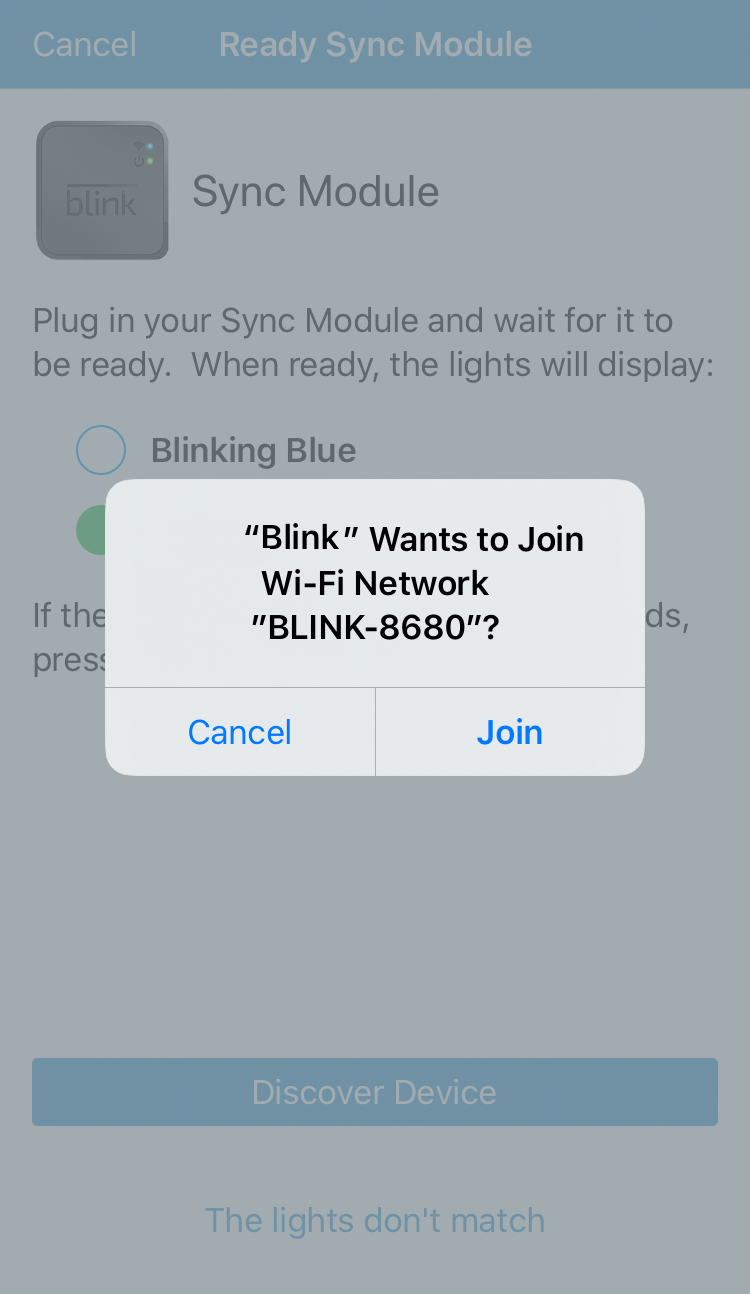
5. The Add Sync Module screen volition instruct yous to plug in your Sync Module and then look for the light design of
blinkingblueish and
steadygreenish.
When yous run into the pattern on your Sync Module, tap Notice Device.
Note: If yous don't come across the blinking blue light pattern, and so y'all may need to reset the sync module. Click for instructions to reset the Sync Module.
6. The Blink app needs to connect to the Sync Module's Wi-Fi network. It is named "BLINK-" followed by four digits from the Sync Module Series Number.
Tap Join, so y'all are asked to join your local Wi-Fi network.
7. The Add together Sync Module screen displays two.4 GHz Wi-Fi networks within range. The Sync Module stores network information for devices that are added to its system. If y'all do not see your local Wi-Fi network, tap Refresh Listing at the lesser of the screen. You can troubleshoot Wi-Fi connections here.
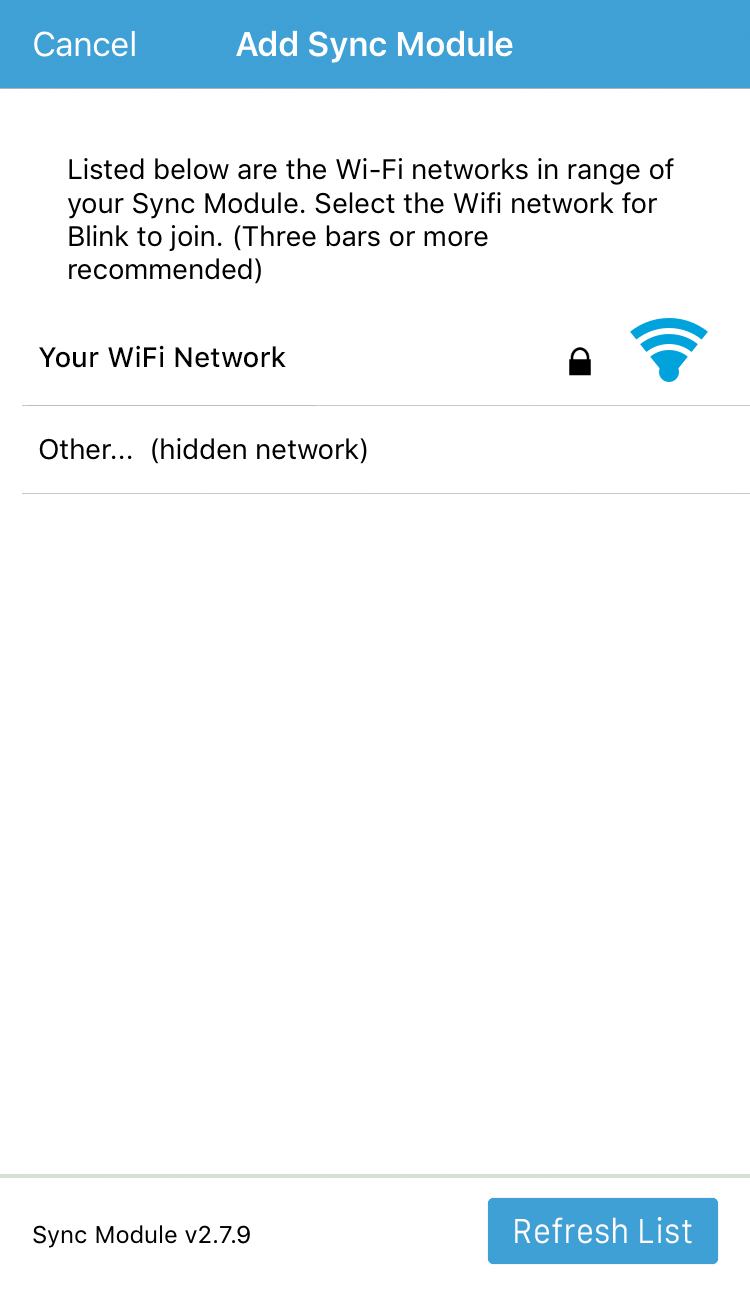
8. When you tap your Wi-Fi network name, you are presented with a password entry field. Ensure that your countersign is correct before you enter it. Incorrect password is a mutual crusade of difficulty getting started. Tap Bring together to go on.

nine. When network setup is complete, you are notified on the screen. Tap Doneto complete the install process and view the Blink app Welcome screen where you can now add a camera.

The system proper name should announced at the top of the Domicile screen. Y'all are notified that the Sync Module has been added, the 'cloud' icon shows a green connection line indicating that the Sync Module is communicating with the Blink servers, and you lot can at present tap the plus symbol + to add a device.

Add one or more than cameras
INSTRUCTIONS
1. From the home screen, tap the Add Device icon + .

2. The Add together Device screen shows devices y'all can add to your system.
Note: The Mini camera and Blink Video Doorbell exercise not require a Sync Module, but they will act like other Blink cameras when added to a Sync Module.
To apply Local Storage, you must add together the device to a Sync Module 2 with a recognized USB drive.
Click to learn more about Local Storage.
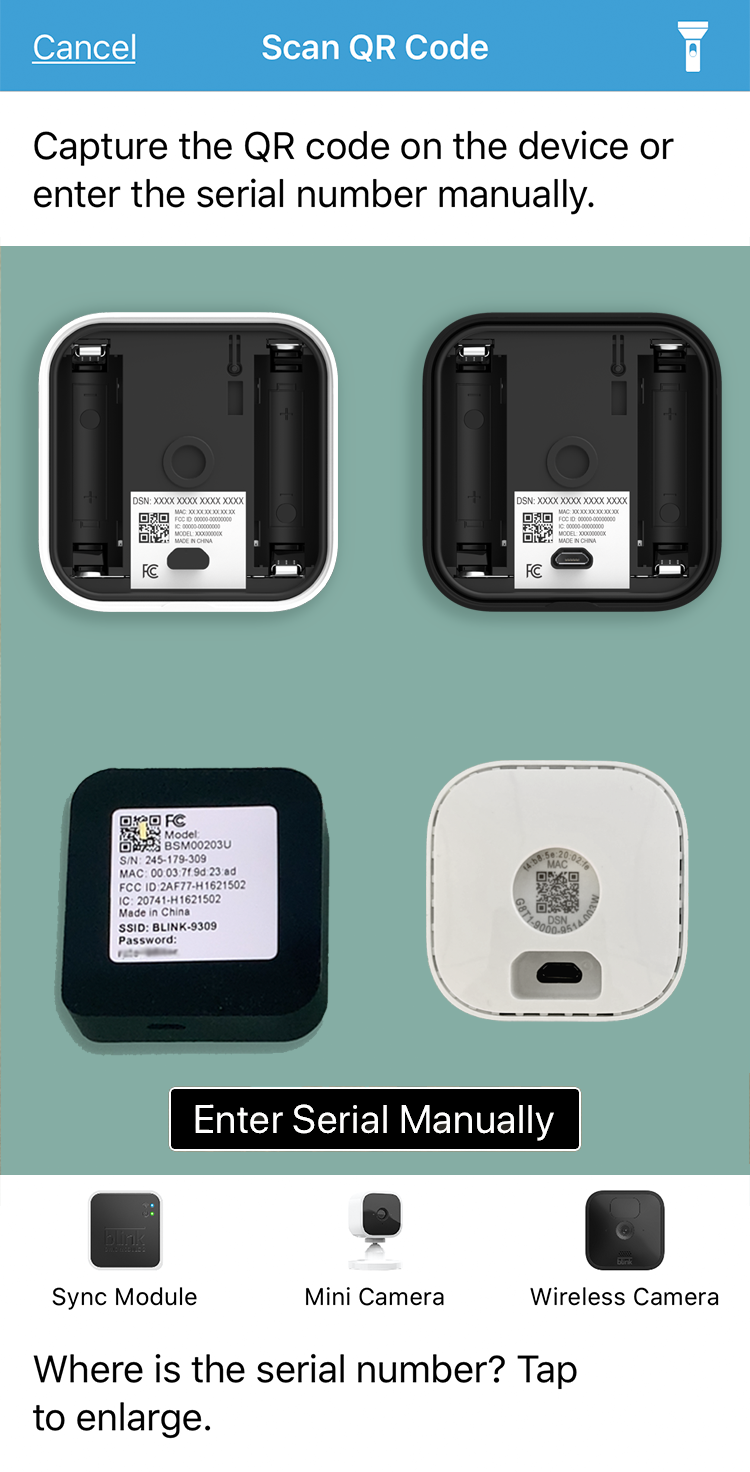
Your pick opens the QR code scanning screen.

3. Enter the serial number.
Your device serial number (DSN) is represented on a sticker in the course of a QR code that is recognized by the camera on your mobile device. If this is your start device added, you are asked for permission to allow the Glimmer app to utilise your device camera. Blink will never access your device camera except when y'all are scanning a production QR lawmaking, and then yous can safely allow access.
The serial number for Mini is printed on the back of the unit, and for other cameras, it is inside the battery compartment. Click for instructions to remove the back encompass of a Blink camera.
If you prefer to not employ your device camera, tap "Enter Serial Manually" and enter the DSN with your keyboard.
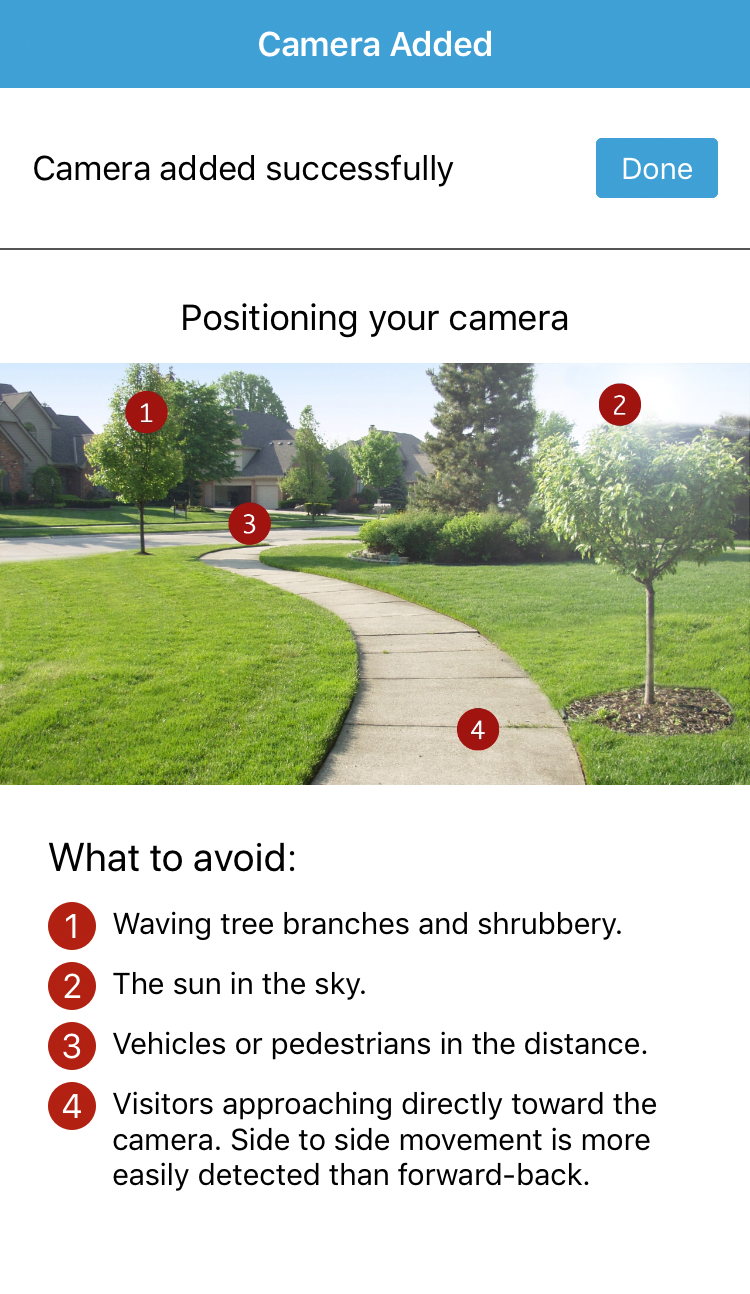
4. Camera addition completed.
When the serial number is accustomed equally valid, the setup process begins and you are shown the "Camera Added" screen with tips on camera placement.
When setup is complete, a notification appears and you can tap Washed.
Click here if you receive an error "Unable to Connect to Sync Module" when calculation cameras to a organization.
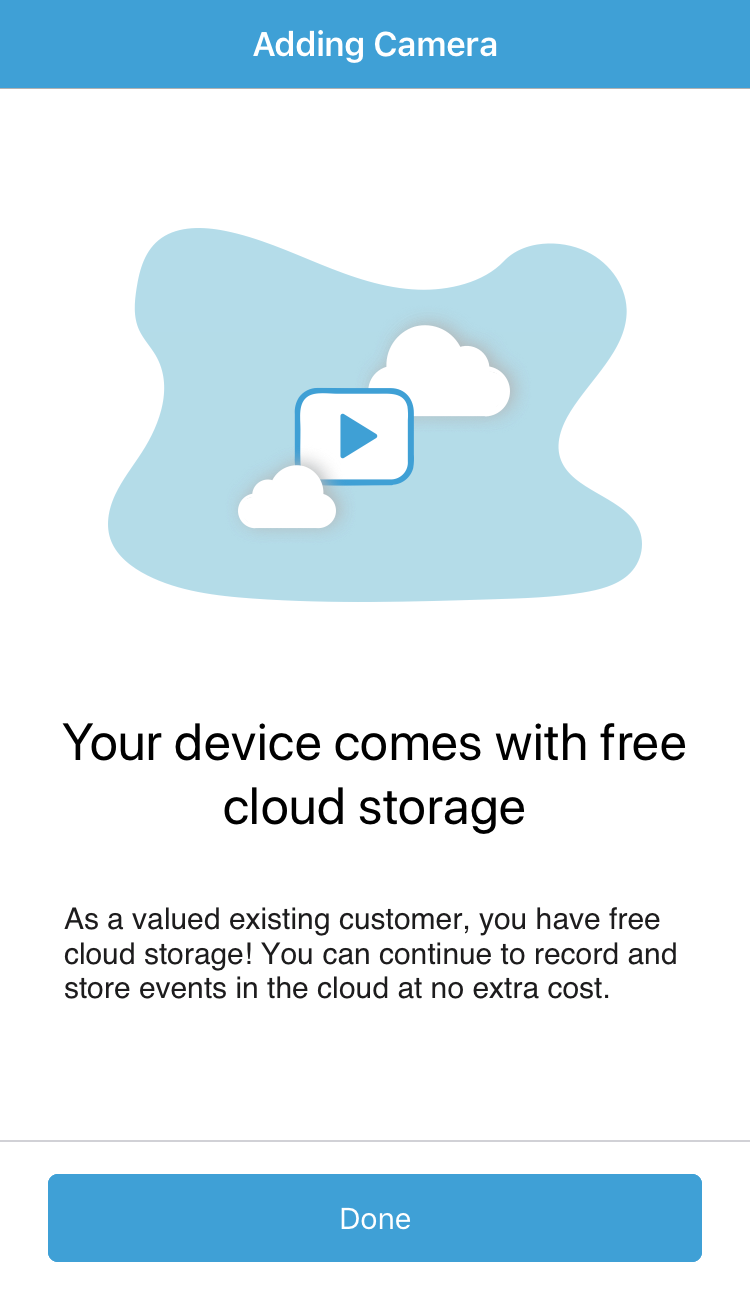
For accounts that were created on or before April fifteen, 2022 you lot continue to use 2 hours of free basic cloud storage for all devices. Each clip is deleted when it is sixty days quondam.
If your Blink and Amazon accounts are not already linked, you lot are asked to link them by borer on the "Link Accounts"button. Yous should link accounts to accept total reward of subscription features.
Note:Y'all too accept the option to select "Skip" which sends y'all to the abode screen without linking your accounts. Click to larn how to link your Glimmer and Amazon accounts later on.
The Link Accounts screen asks you to sign into your Amazon account, or create a new one if needed. When the "Success! Accounts linked." message appears, click "Next"to go to the Home screen.
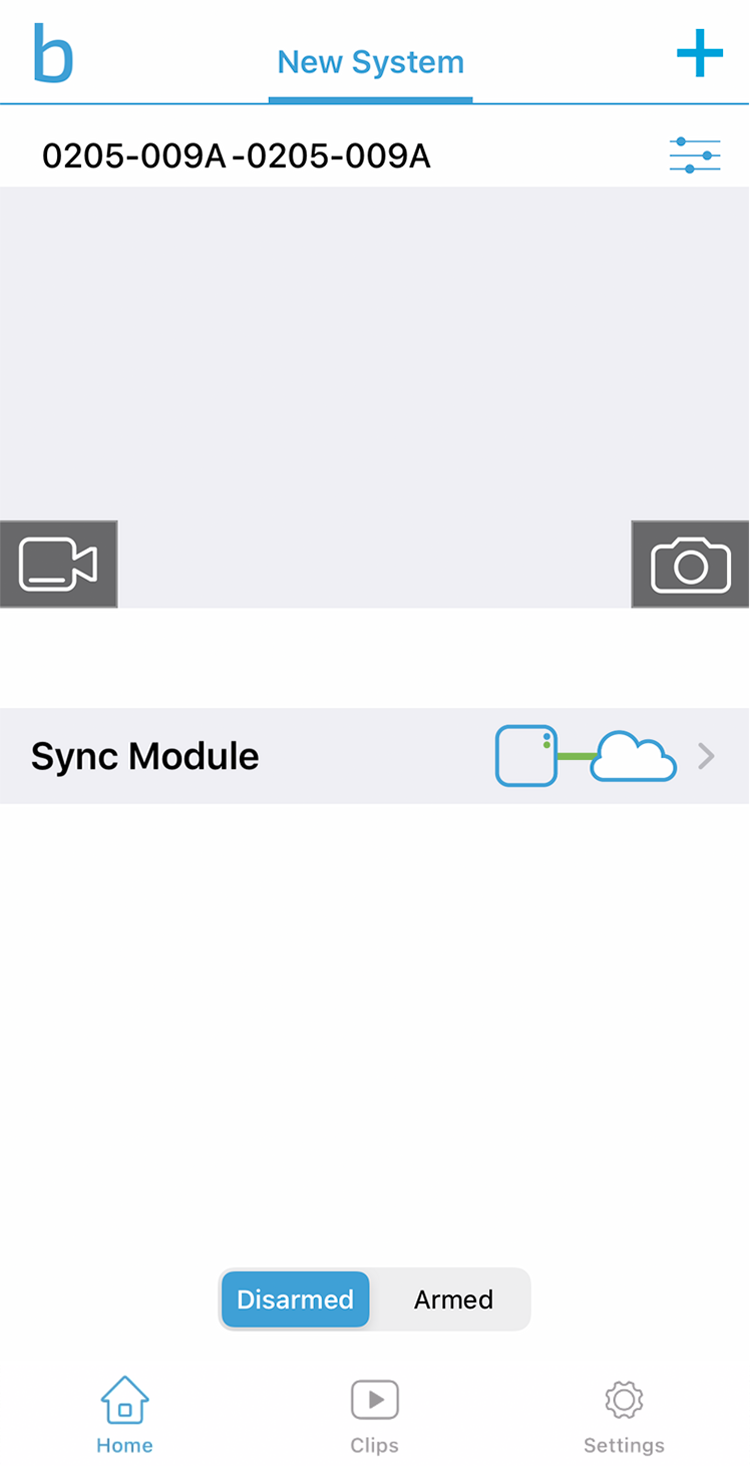
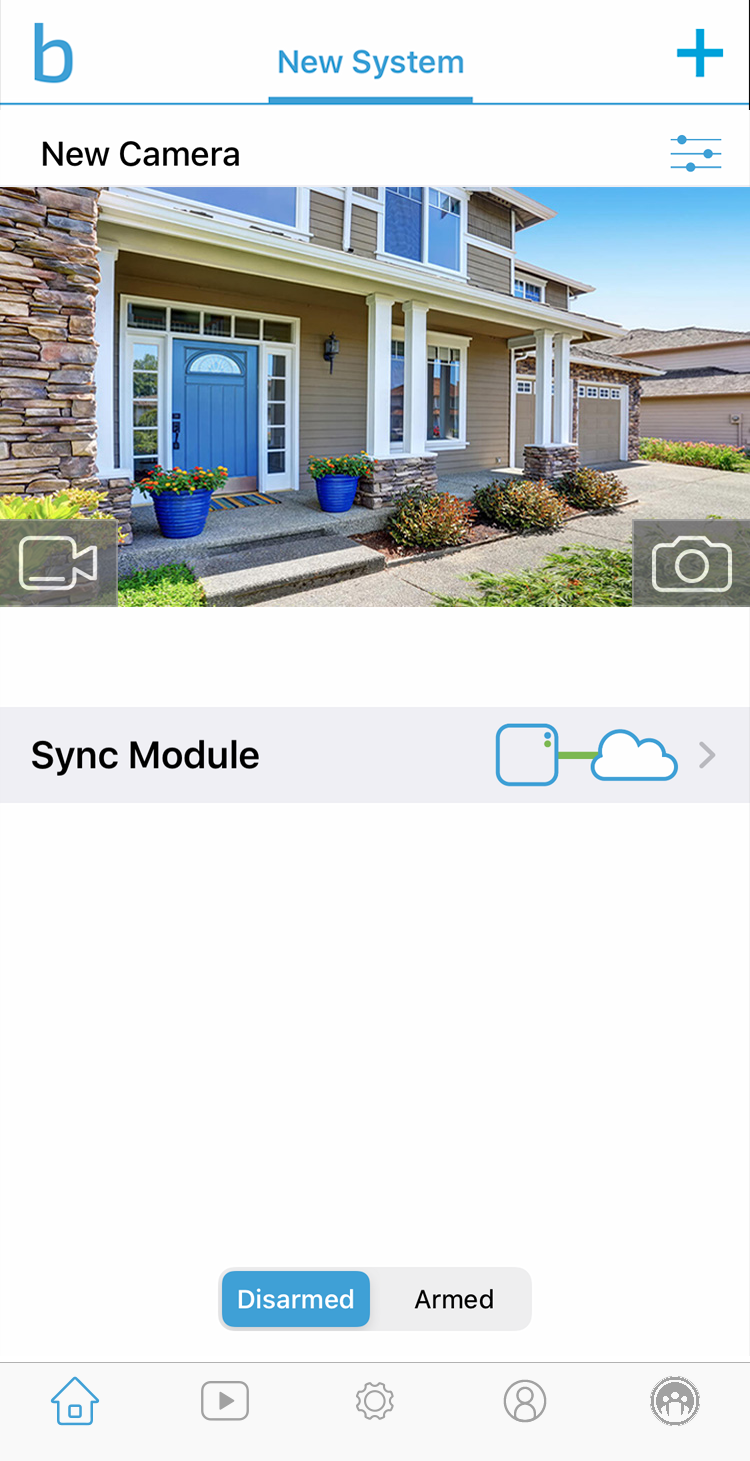
five. The Abode screen now shows a blank thumbnail and the camera name is its serial number.
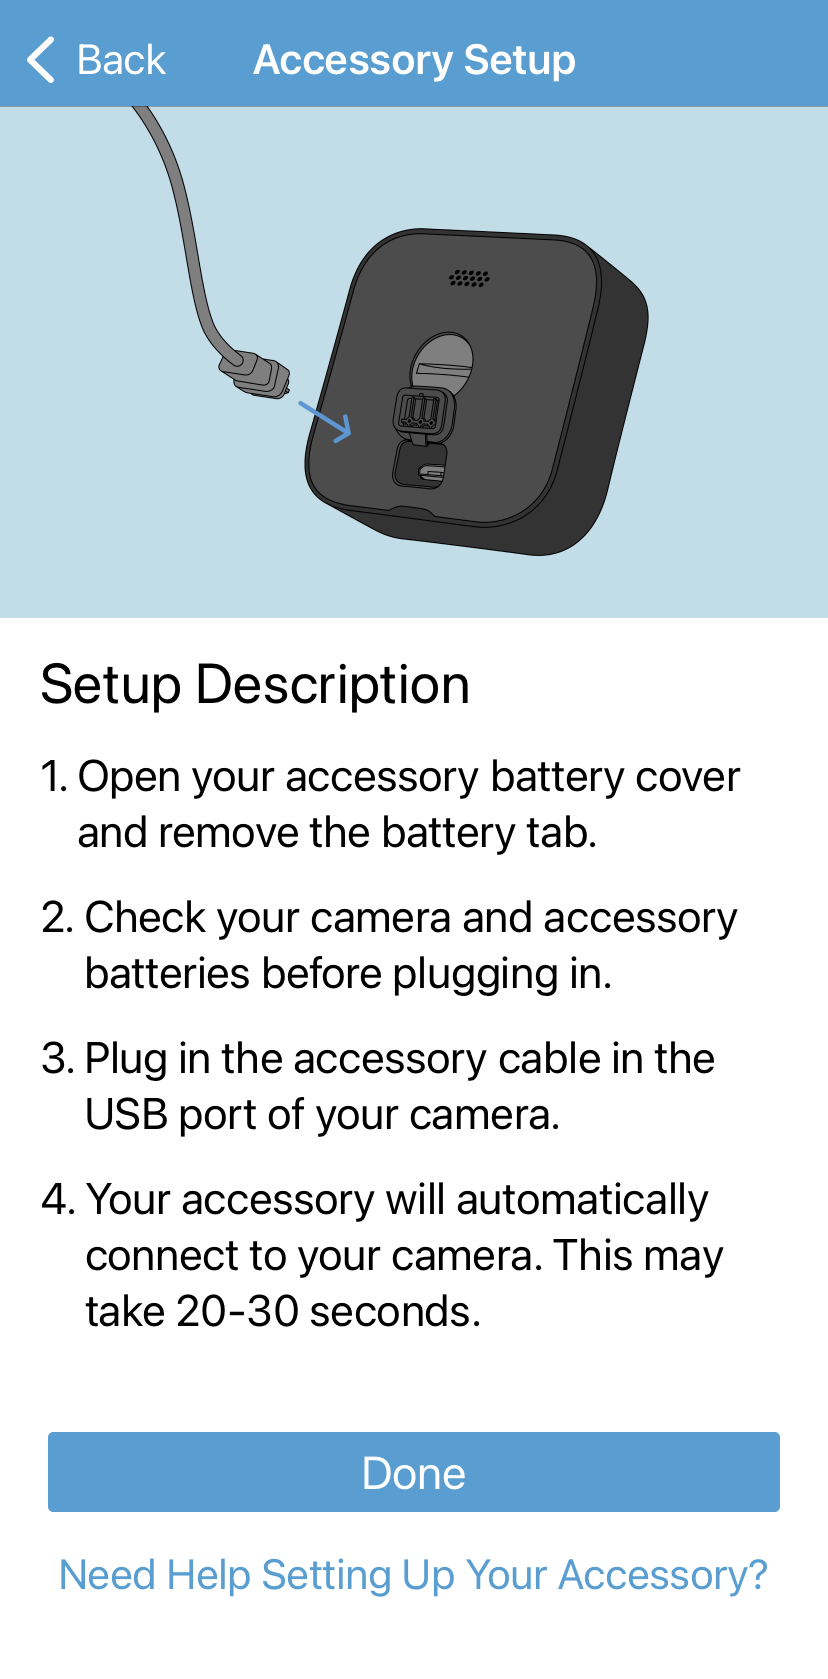
Add an accompaniment
Blink accessories automatically add to existing accounts when an Outdoor camera is plugged into them. When yous tap the Plus symbol + on the app home screen, you can select the "Camera Accessories" option at the lesser of the Add Devicescreen.
You volition then see the "Accessory Set up Up" screen which provides instructions on how to connect your Outdoor camera to your accompaniment. Tap the Washedbutton one time yous have plugged the USB cablevision into the port on your camera.
- Click hither for additional Blink Floodlight setup instructions.
- Click here for boosted Blink Solar Panel setup instructions.
Next Steps
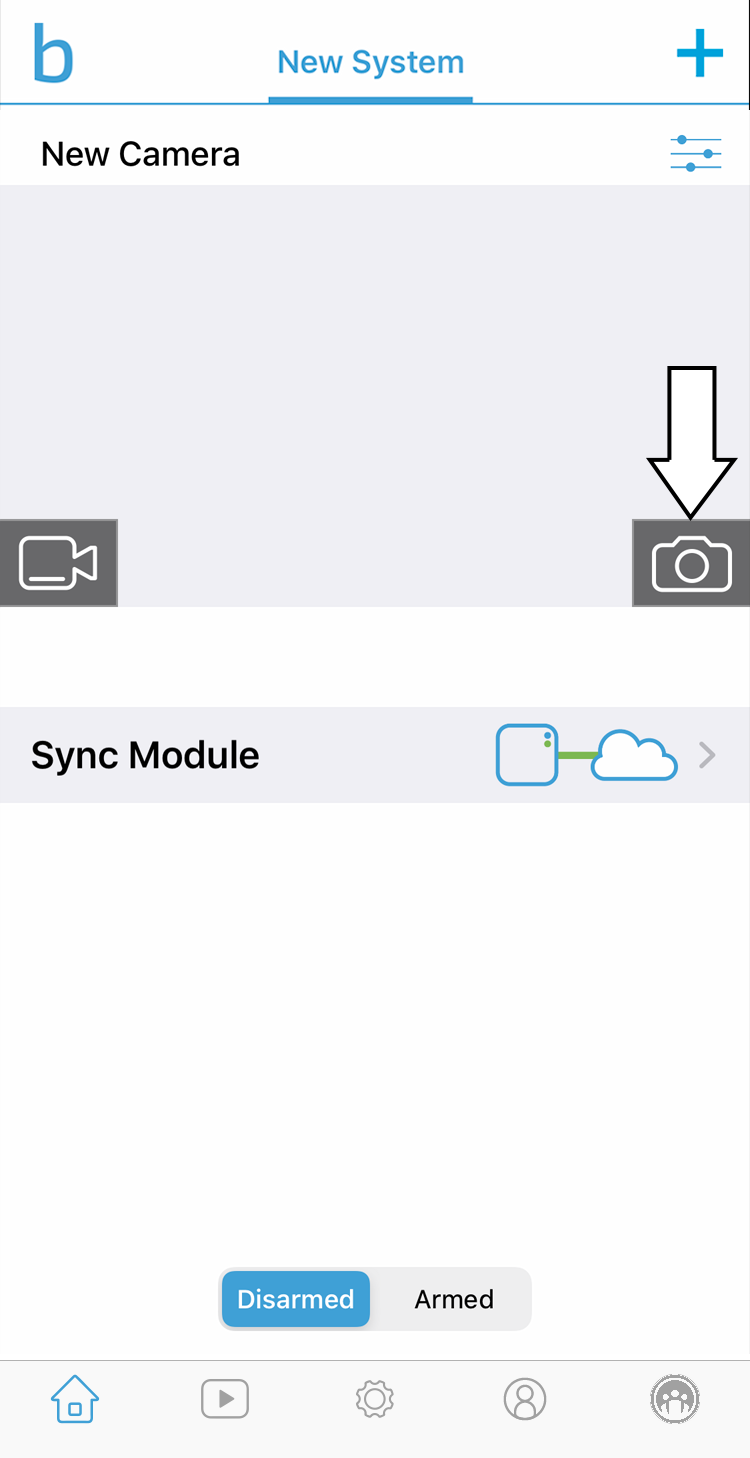
When a photographic camera is commencement installed, the serial number is entered for the photographic camera name, and its thumbnail image is blank.
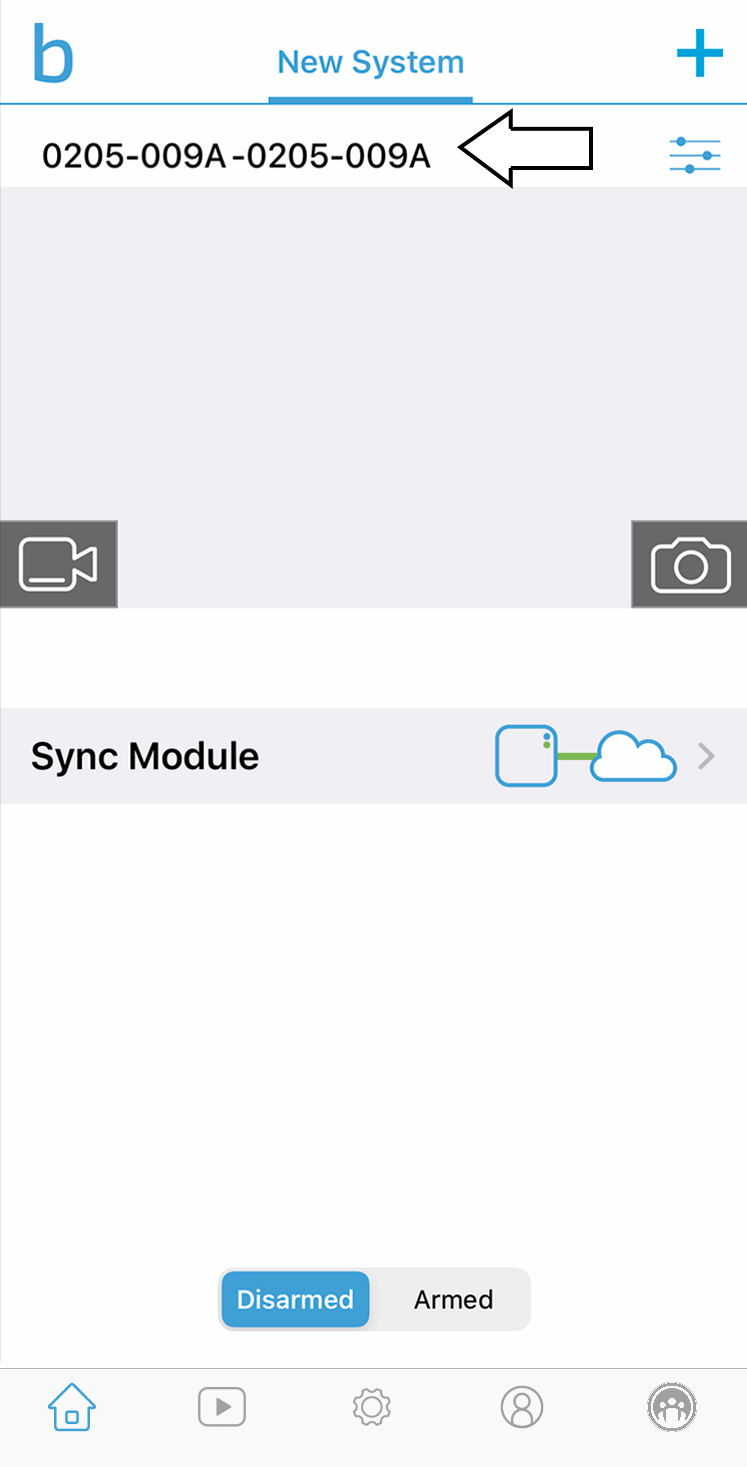
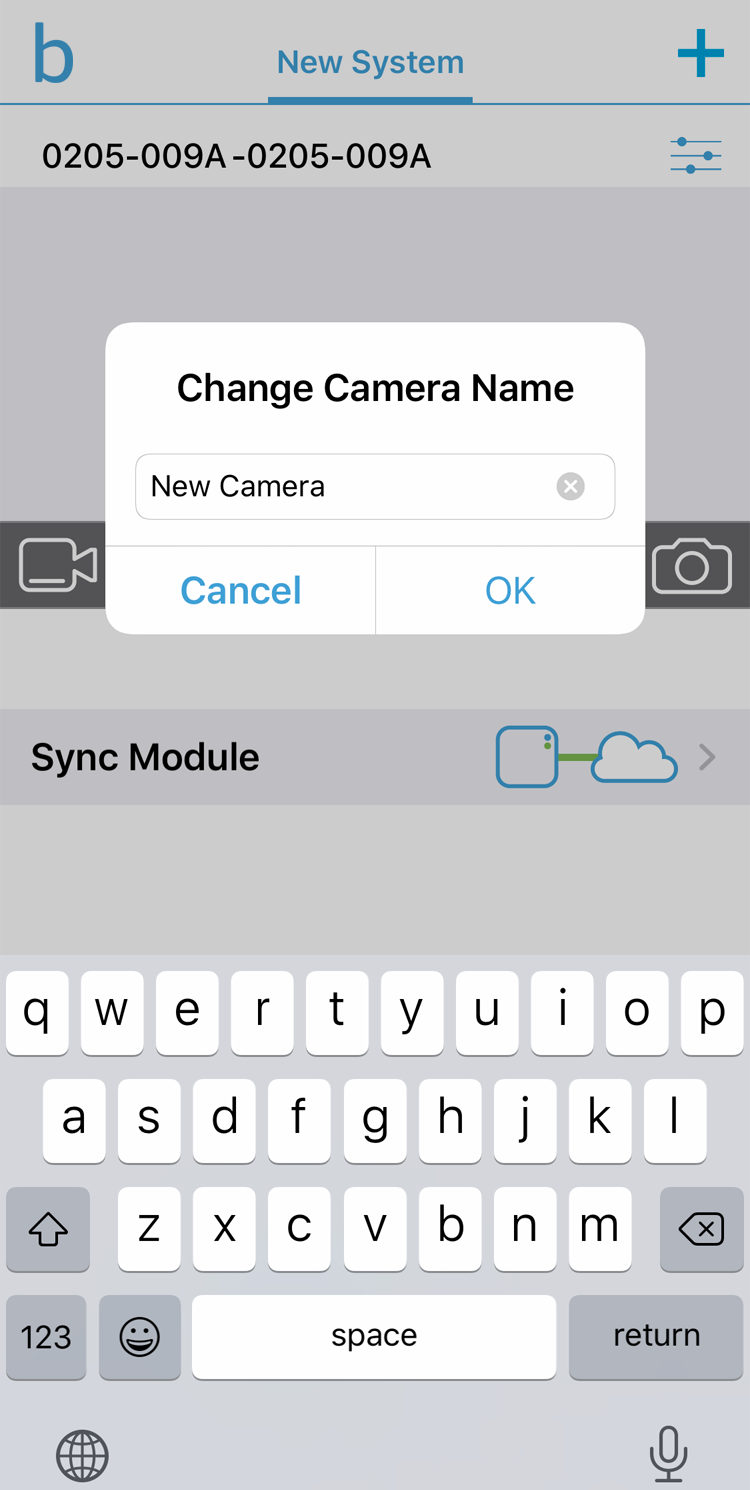
Tap the camera name to change it, enter the new proper noun, and so tap OK to save.
Tap the thumbnail icon to accept a new thumbnail image. The thumbnail remains until you refresh it with this button. With a doorbell, the thumbnail image is refreshed when the ringer button is pressed.
Click to larn more nearly using the Blink app.
Camera Placement
Glimmer cameras have an effective movement detection organisation, simply it is possible that the photographic camera will be triggered by more than but a human presence.
The InfraRed detectors in a Glimmer camera find when estrus is present in the camera view and the camera'southward sensitivity setting relates to the size of the heat source that will trigger an warning. The camera does non see depth, so a nearby small object will appear similar to a large object in the altitude, only their heat sources will unremarkably exist quite different.
The goal of tuning your photographic camera sensitivity is helped by good camera placement. The photographic camera's Infrared movement detector is sensitive to rut differences in the view as an object moves, and so whatsoever rut source could potentially trigger a motion alert. If your camera has a route in view, and passing cars reflect sunlight at sure times of the day, your camera volition observe the flashes as rut and motility. If your photographic camera is viewing trees that move in the wind, and the sun is behind them, that motion could exist a trigger.
We accept created photographic camera sensitivity zones that you tin select and disable to avoid false triggers. The camera sensitivity setting helps, but you will have the best experience if you place the camera looking at an area where you do non expect a lot of random move. For case, having the camera indicate toward an entrance is more effective than pointing the photographic camera down the walkway from an entrance. The difference is, when pointing to the entrance, only motion at the door will trigger the motion alert. When pointing downwardly the walkway, many possible triggers could send an alert that you are not interested in.
For motion alerts to be most reliable, place your camera and so that the heat source must move beyond the view rather than toward the camera. Movement toward the photographic camera produces far less difference over time than motion across the view.
Every motion warning volition apply some battery power, so it is a benefit to receive only the alerts you want.
To integrate Blink cameras with an Alexa device for really useful experiences, visit our Alexa Motility Announcement and Routine Trigger pages.
Mounting the camera
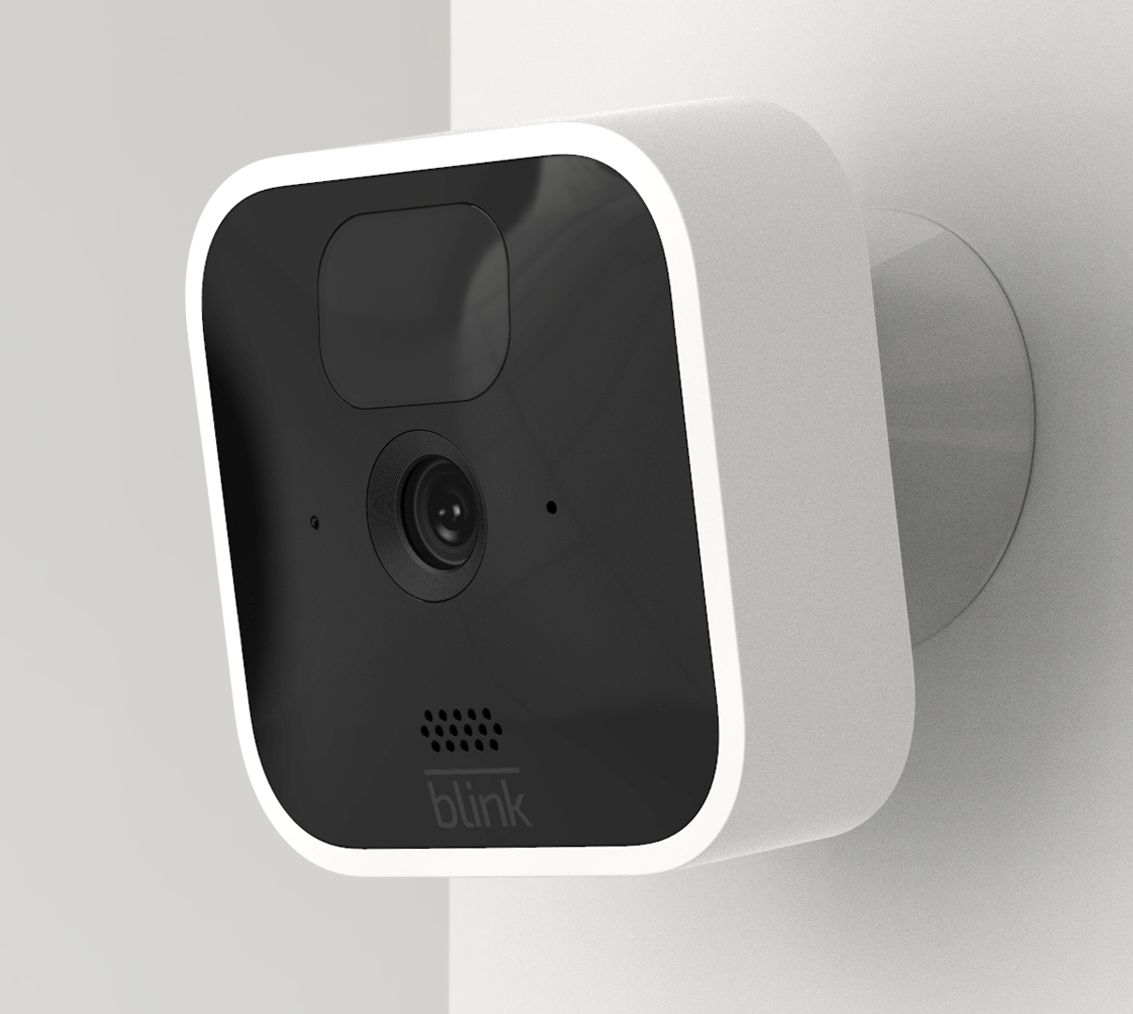
Blink lightweight wireless cameras are easy to mount securely.
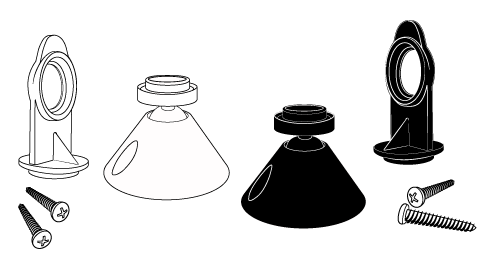
Your Blink Outdoor, and Indoor (gen two), photographic camera comes with a right-angle adapter/opening tool and "volcano" cone-shaped camera mount matching the color of your camera body.
Mounting screws are included in the box.
Extra mounts and other accessories are easily plant at amazon.com.
Y'all can verify the photographic camera view and check placement simply by belongings your camera in the desired location, and using the Blink app to refresh the photographic camera thumbnail, or enter Alive View. Ensure that your preferred location has three confined of connectivity with both the Sync Module and your Wi-Fi network. Verify connectivity from the photographic camera settings ![]() screen of the Blink app.
screen of the Blink app.
Continue in mind that the best motion detection occurs when move goes beyond the field of view. Motion direct toward or away from the photographic camera can be harder to detect. Camera placement helps your camera settings exist most constructive. Learn more than about tuning your camera here, and nigh camera placement here.
When you have adamant the best location for your photographic camera, secure the mountain to a surface. If it is appropriate, apply the included screws. The mountain and screws are non-corrosive, simply some moisture buildup may occur underneath the mount base.
How do I mount horizontally?
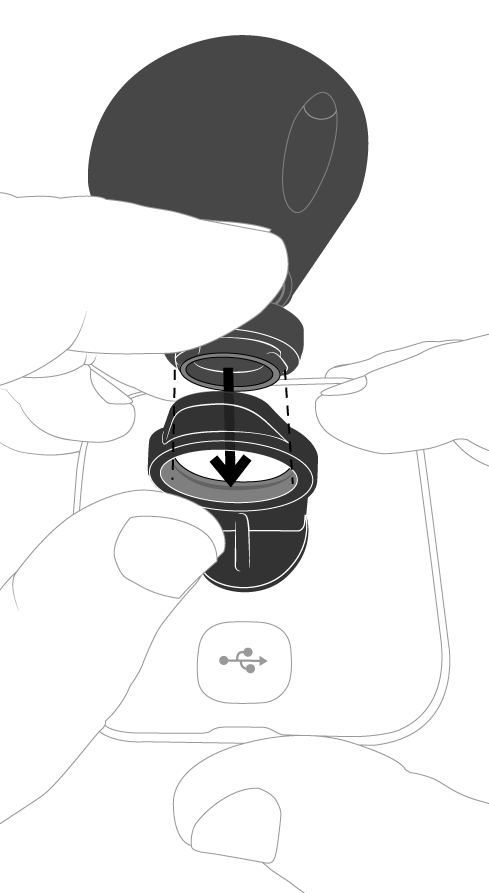
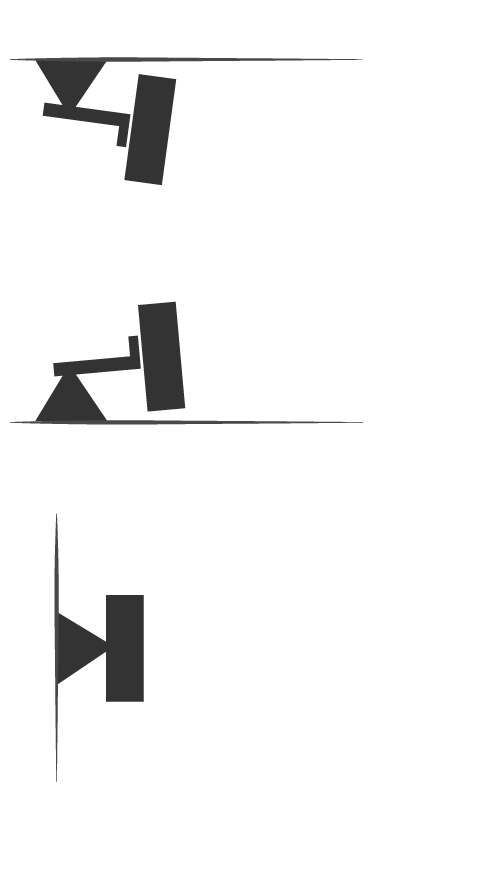
In horizontal locations such as a ceiling, or shelf, use the Right-angle adapter (pictured). This adapter snaps into the opening on the back of the camera, as shown with dashed lines beneath. Remove the silicone disc if information technology is nowadays, to access the mount opening.
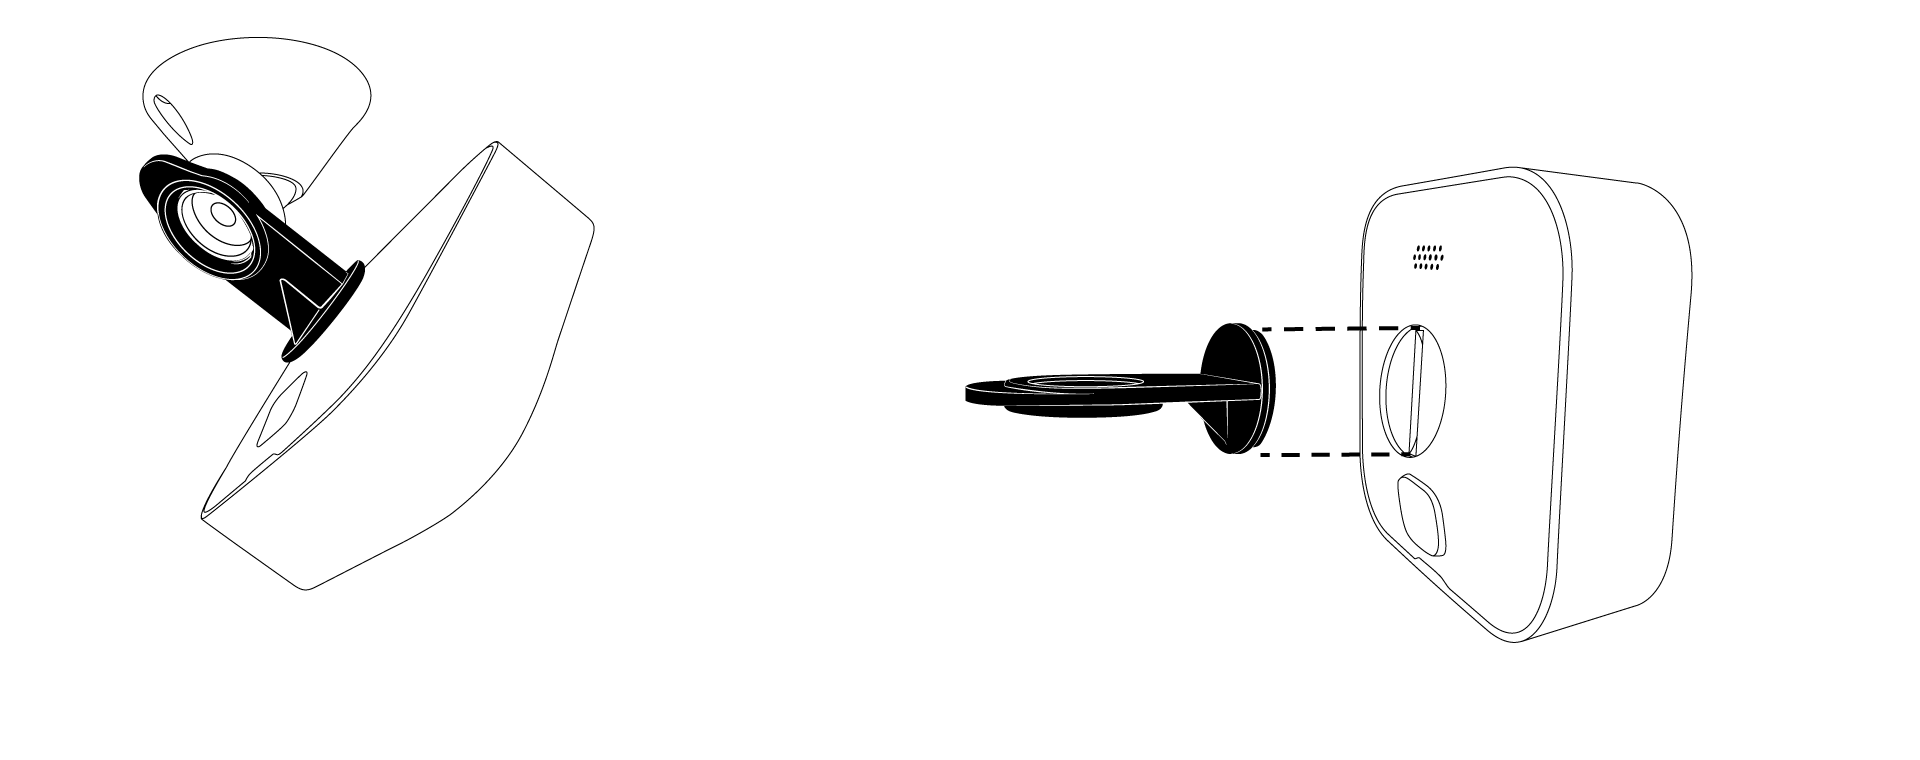
Now, press-fit the adapter onto the connecting betoken of the mountain. Yous should detect a 'snap' indicating a secure attachment. Your placement may require that you lot adhere the adapter to the camera earlier attaching both to the mount.
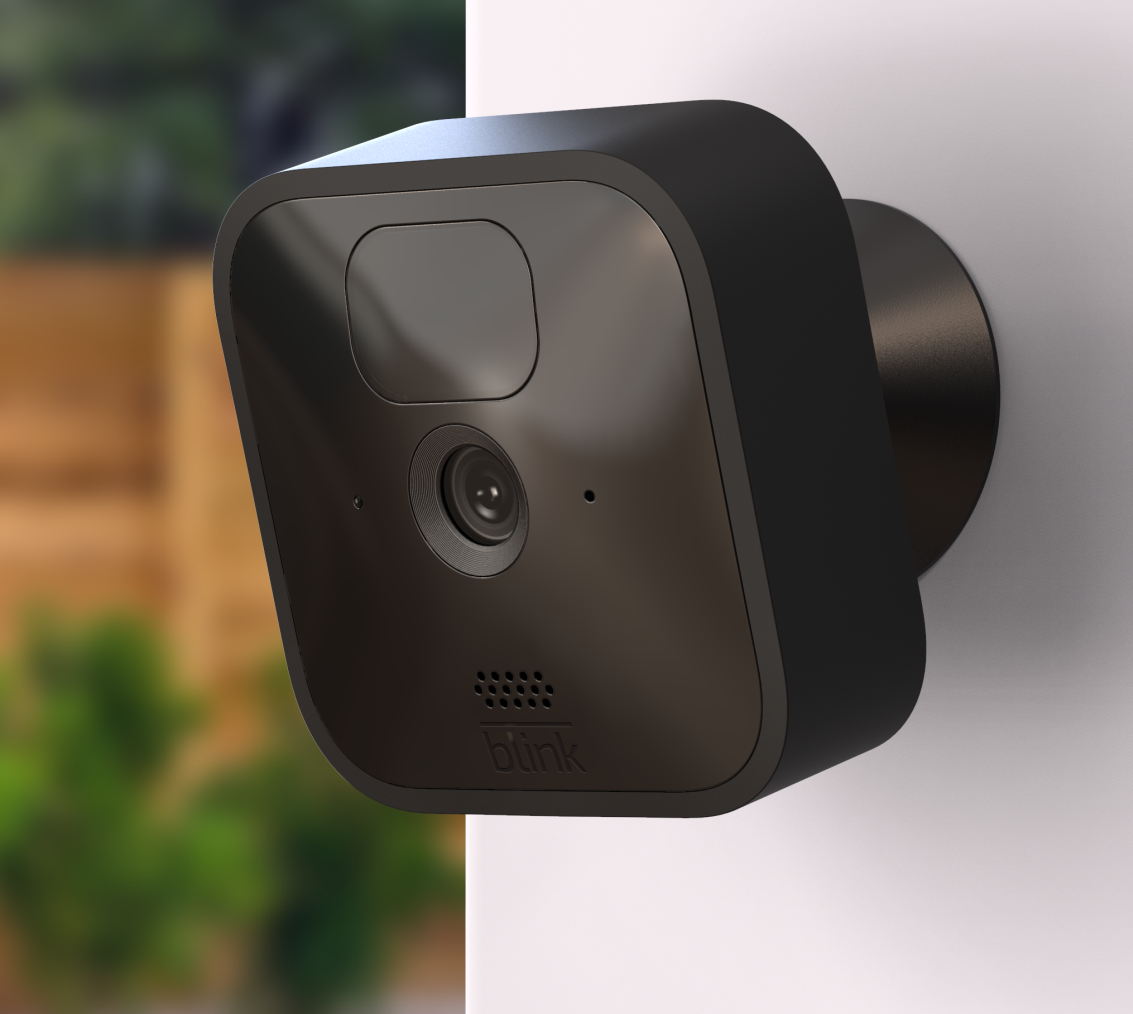
Vertical Mounting
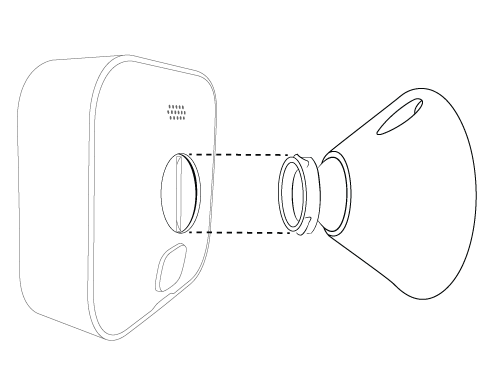
In vertical mounting locations such as a wall or postal service, the camera can connect directly to the volcano mount. The camera opening snaps directly onto the mountain equally shown in the epitome.
When your camera is mounted, go to the Blink app and create a thumbnail or enter Live View, to know if the photographic camera view is right, or needs to be adjusted.
Click to learn about motion detection.
Click to learn near Activity Zones.
The packaging insert contains important information about the product and warranty.
Click the prototype to download a .pdf of the EU and Great britain version of the Glimmer Indoor & Blink Outdoor packaging insert.


Source: https://support.blinkforhome.com/en_US/setting-up-your-battery-powered-camera
Posted by: cousarhiserfuld1987.blogspot.com
0 Response to "How To Install Blink Xt"
Post a Comment